![]()
This article assumes you're familiar with Active Server Pages,
Visual InterDev, SQL Server 6.0, and
C++.x.
Download the code (123KB)
|
This article may contain URLs that were valid when originally published, but now link to sites or pages that no longer exist. To maintain the flow of the article, we've left these URLs in the text, but disabled the links.
|
|
Delivering Web Images from SQL Server Scott Stanfield |
| Sometimes a GIF is more than a GIF. Scott Stanfield shows you how to retrieve images from a database and feed them directly to an end-surfer through an Active Server Page. |
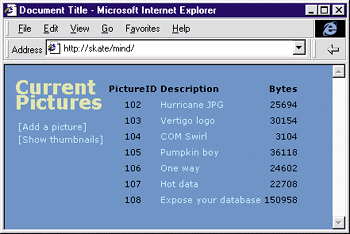
| Let's say you want to manage your Web site images in a database. You might want to store product pictures for your cyberbusiness, hold scanned documents for a client project, or list photos for a family reunion (see Figure 1). No matter what the final application, there are two problems to solve: how do you get the images into the database, and then how do you get them out? |

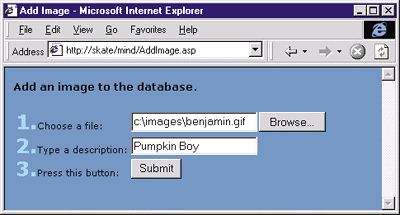
To make things more interesting, suppose you want to submit images directly from a Web browser, as shown in Figure 2. The GIF or JPEG image must travel through a Web page, onto the Web server, and into a database record.

You need a fair amount of technology to solve this problem. What I'll present here is a roadmap to a complete
solution using a mix of different Microsoft® products. At the end of the guided tour, you'll have a set of ASP files and a useful component to add to your own projects.
If you want to skip ahead and see the site in action, point your browser to http://www.vertigosoftware.com/mind. (Don't upload any images you wouldn't want your mother to see!) I built this entire site on a single well-configured workstation. The following lists every product used in this article. It looks like a lot, but most of the pieces are installed by the Windows NT® Option Pack.
Configuring the Database
I need a simple, one-table database to store the images and descriptions. For this example, I'm going to use SQL Server, but you could create a similar table in a different database like Microsoft Access.
First, create a 30MB database called Mind using SQL Enterprise Manager. Next, use the SQL Query Tool to create the Pictures table from the following script. The Bitmap column holds the GIF image bits, Description stores a short textual description of the image, and PictureID is the primary key.
 CREATE TABLE Pictures (
     PictureID int IDENTITY (1, 1) NOT NULL,
     Description varchar (255) NULL,
     Bitmap image NULL
 )
 insert into pictures (description, bitmap)
 select convert(varchar(255), pr_info), logo
 from pubs..pub_info
ImageDB Server Component
The ImageDB server component mentioned earlier is a COM object built using ATL in Visual C++ 5.0. The ASP code I'll implement will use ImageDB to attach a file on the server to any column in the database (I use Pictures.Bitmap).
The next step is to create a new Visual C++-based project using the ATL COM AppWizard. Name the project Mind and accept all the defaults on the next dialog. Then insert a new ATL Simple Object with the short name ImageDB. Again, the defaults are fine for this dialog, so press OK. Visual C++ 5.0 generates the ProgID ImageDB.ImageDB.1, while Visual C++ 6.0 generates it as Mind.ImageDB.1. While the latter is slightly more descriptive, this article will assume you are using Visual C++ 5.0.
Add the following import directive to the stdafx.h file. This wonderful line of code instructs the compiler to parse the ADO type library and build a C++ wrapper around the interfaces. You may have to change the #import statement depending where you keep your msado15.dll file.
 // The following must be on one line in your code
 #import "c:\Program Files\Common Files\System\ado\msado15.dll" no_namespace rename( "EOF", "adoEOF" )
 interface IImageDB : IDispatch
 {
     [id(1), helpstring("SetImage")]
     HRESULT SetImage([in] VARIANT ADOFieldDispatch,
         [in] BSTR bstrFilePath);

     [id(2), helpstring("method DeleteFile")]
     HRESULT DeleteFile(BSTR bstrFilePath);
 };
 Set rs = Server.CreateObject("ADODB.Recordset")
 rs.Open "pictures", Application("Mind_ConnectionString"), 2, 3
 rs.AddNew

 rs("Description") = "Ben's Birthday Photo"
 rs.Update
 rs.Close
rs("Bitmap") = "c:\temp\benphoto.gif" ' this doesn't work
imagedb.SetImage rs("Bitmap"), path
|
|
Copy mind.dll to your Web server and register it with regsvr32.exe. Alternatively, you can drag and drop the file into a new package in MTS. It's easy to monitor the performance and instantiations using the MTS status view.
You need a special place on the server to hold the submitted images. Since the files will only be there temporarily, the Temp folder is a good candidate. By creating a virtual directory called Upload on the Web server, you can control write privileges and provide a good place for the temporary files. Run the Internet Service Manager, also known as the Microsoft Management Console. Right-click on Default Web Site and create a new virtual directory. A wizard will guide you through the rest of the steps. For the alias, enter "upload." Type in the path to your temporary directory (like C:\Temp) on the next page and press Next. Turn off read and script access but enable write access on the last page. To support clients besides Microsoft Internet Explorer (such as Netscape Navigator) you'll have to change one more setting. You need to modify the allowed authentication methods for the scripts folder. The Posting Acceptor DLL lives in the Inetpub-\Scripts folder in a file called cpshost.dll. (If you don't have it installed, you can rerun the Option Pack setup or download a version from http://www.microsoft.com/windows/software/webpost. Look for a link that's called Microsoft Posting Acceptor 1.0.) The Posting Acceptor implements RFC 1867, the form-based file upload in HTML. It's what allows a browser to submit a binary file via HTTP. You can see the details at http://www.internic.net/rfc/rfc1867.txt. This version of the Posting Acceptor allows only anonymous uploads, so users will be prompted for a Windows NT login and password. Since Navigator doesn't support the Windows NT Challenge/Response protocol, it will attempt to send the login in clear text. This creates a problem, since default IIS-based Web sites do not allow for clear text passwords. You can change this by displaying the properties for the scripts folder in the Management Console. Click the Directory Security tab and press the first Edit button. Enable the Basic Authentication option and press OK.
Create the Site
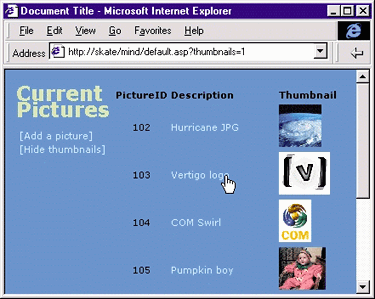
Visual InterDev 6.0 stores the data connection string in an Application variable. If you're using Visual InterDev 1.0, you'll need to change the ASP pages to use the Session variable instead. Add a stylesheet called Styles.css to the project. Figure 6 shows the proper styles to put in it. Next, add a new file to your site called Default.asp and populate it with the code from Figure 7. This page uses a stock ADO query to get a list of pictures from the database. A simple table shows the PictureID, the description, and the size of the image in bytes. A hyperlink redirects back to this page and enables the thumbnails as shown in Figure 8. |
 |
| Figure 8: Image List with Thumbnails |
|
Now you need to turn the image bits into a true GIF file and send it to the client (see Figure 9). Create a new ASP file called Picture.asp and add the code from Figure 10. First, change the content type of the file from text/html to image/gif
so the client interprets the stream as an image. Then a simple query inserts the image data into the page using Response.BinaryWrite.
Now you have a script, Picture.asp, that can trick clients into seeing it as a GIF file. Anywhere in the ASP-generated HTML you would normally put an <IMG> tag pointing to a GIF file, you can substitute Picture.asp in the SRC= parameter. For example, if you normally reference a logo.gif file like this <img src="logo.gif"> you can instead use this: |
|
|
Here, logo.gif has a PictureID of 42 in the database.
Now create a new page called AddImage.asp with the code from Figure 11. The first chunk of ASP code builds the action variable out of the path to the Posting Acceptor DLL (cpshost.dll) followed by the PUBLISH parameter. This parameter points to AddImageAction.asp, the code that will execute after the GIF image has been received by the server. I tagged the form element with an encoding type of multipart/form-data. This instructs the Web browser to send the form data using the RFC multipart specification. The hidden form variable TargetURL specifies where the files should be stored on the server. |
 |
| Figure 9: Picture.asp Showing an Image |
|
Finally, the last file! Put the code from Figure 12 in a new file called AddImageAction.asp. AddImageAction is where all the hard work pays off. Notice the first section of ASP code where a path string is built from a set of Form variables. These variables were sent by the Posting Acceptor. Remember, you don't actually go directly to AddImageAction.asp; the Posting Acceptor intercepts the multipart forms and redirects the server here after the file is transferred.
The path is sent to an instance of your ATL COM object, ImageDB, through the SetImage call. The other parameter to SetImage is a recordset field object. After SetImage, DeleteFile removes the temporary file.
Conclusion
|
From the July 1998 issue of Microsoft Interactive Developer.