by Loyal Pridgen
Microsoft added many new features to Visual InterDev 6 to help Webmasters create and maintain a consistent look throughout a large Web site. Site users should be able to focus on the content, not on navigation. Site Designer provides a graphical overview of the site hierarchy. Used in correlation with layouts, Webmasters can create and enforce consistent navigation throughout your site. Site Designer can be used right from the beginning of a project to storyboard a site, or it can be used when reorganizing an existing site.
While Site Designer is great for building a Web site, this article will focus on the features of the program that make it easy to maintain or reorganize an existing site.
Using Site Designer on existing sites
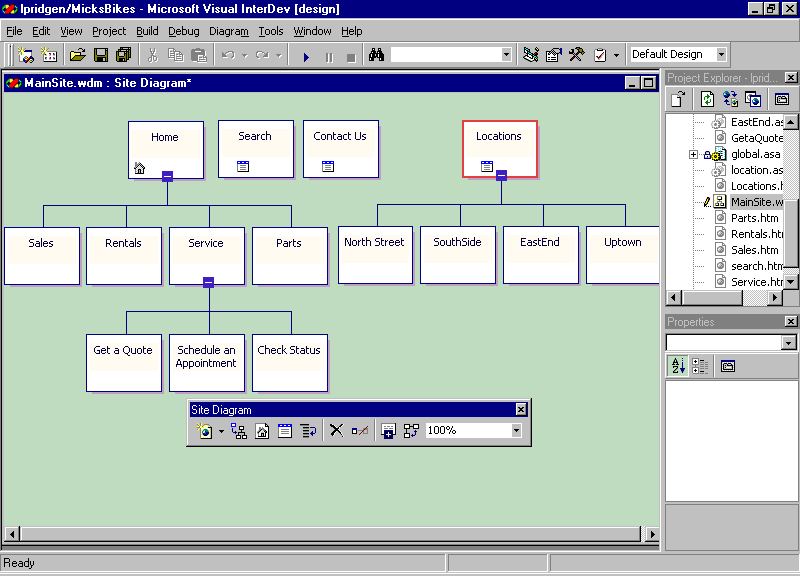
Many Web sites were created before Visual InterDev 6.0 and will not have the luxury of having been initially created with a Site Diagram as shown in Figure A. Webmasters can still benefit from Site Designer to help maintain and update your existing site. The mechanism for updating your site to use Site Designer will vary according to your site's implementation. As a rule of thumb, make sure that you back up your site before you switch to a new development tool, including Visual InterDev 6.0.

Figure A: Site Designer displays the fully expanded Site Diagram for the Mick's Bikes Web site.
Obviously, previously existing Web sites will not have a Site Diagram. However, those who developed their site with FrontPage 98 and used themes in FrontPage 98 will find the conversion to Visual InterDev 6 pretty trivial. All you need to do is add a Site Diagram to your site. Because Visual InterDev 6.0 and FrontPage 98's themes are compatible, Visual InterDev will immediately import your FrontPage 98 site layout into the new Site Diagram. All of your themes and layouts are still applicable.
For those of you who did not develop with FrontPage 98 but "rolled your own" navigation, the answer is not as simple. If you did all your navigation using frames, then you should be able to drag all your content pages onto your Site Diagram and recreate your navigation hierarchy pretty quickly. If you did not use frames, then you can still drag all your pages onto the Site Diagram and create your hierarchy diagram, but then you will have to go through each page and remove your navigation mechanisms.
Reordering Global Navigation Bar items
To illustrate the strengths of Site Designer, we've created a sample site for a business named Mick's Bikes. The sample site is admittedly short on content, but it provides an organization for his content and the consistent navigation and look that we desire.
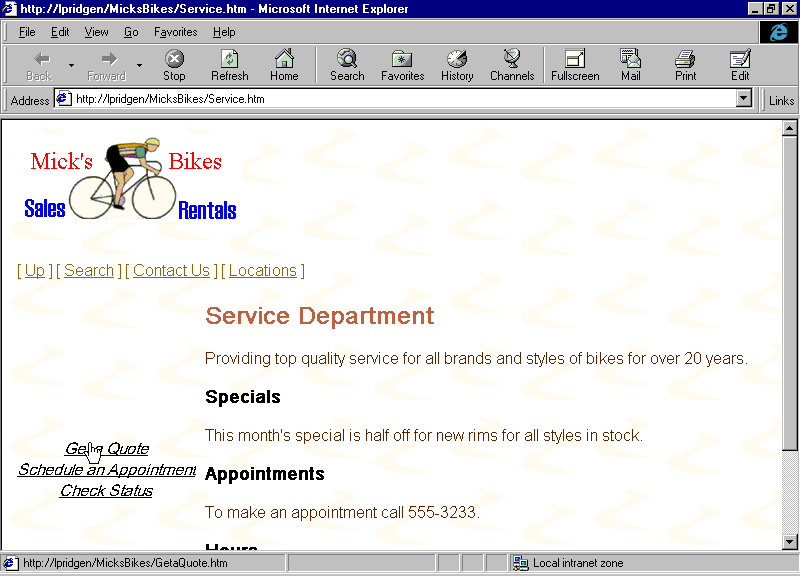
Figure B: This sample page from the Mick's Bike Web site shows working navigation bars at the top and left of the page.
Mick really wanted the Locations item to be first in the global navigation toolbar. We can quickly change the order by choosing the fifth button on the Site Diagram toolbar (Figure C). Then specify the order on the Reorder Global Navigation Bar dialog (Figure D). All changes made here will be applied throughout the site as shown in preview Figure E.

Figure C: Use Site Diagram's toolbar to reorder pages on the Global Navigation Bar
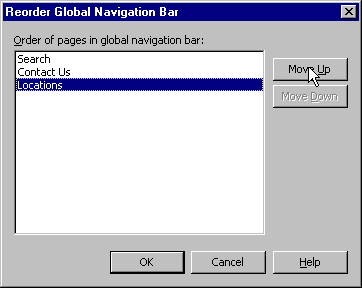
Figure D: Reorder Global Navigation Bar pages using this dialog.
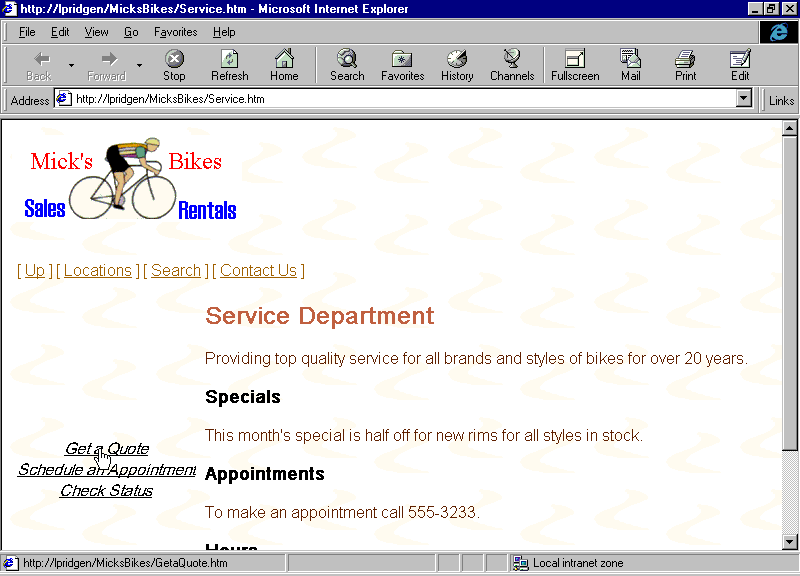
Figure E: Preview after changing Global Navigation Bar order
Changing a page's properties
One of our site's pages, entitled Schedule an Appointment, has an overly long default URL (scheduleanappointment.htm). We would like to change the URL, but we do not want to change the title. We can change certain properties about a page by right clicking on the page in Site Designer and selecting properties from the context-sensitive pop-up menu. On the Property Pages dialog, change the filename displayed in the URL field to appointment.htm as shown in Figure F.
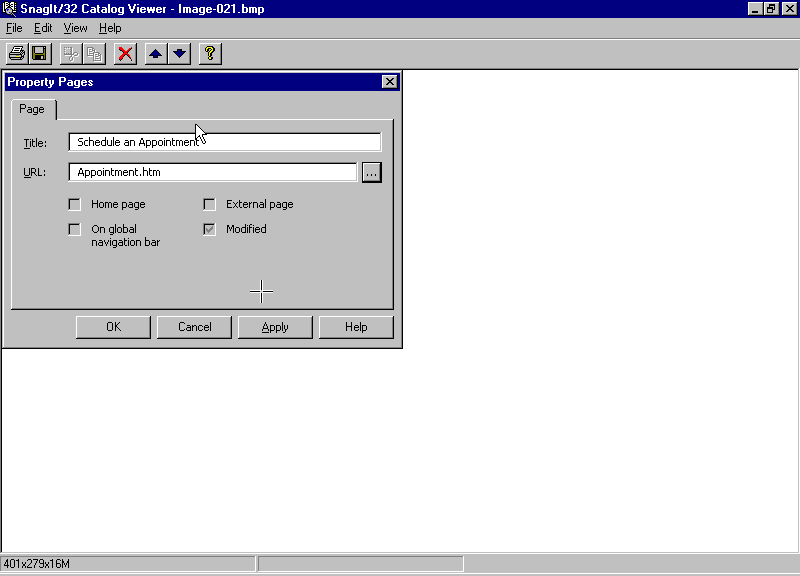
Figure F: Override the default URL on the Property Pages dialog.
Applying a new theme to a site
Mick wasn't real happy with the look and feel of the site we created. The navigation bars use text, and he would like to see buttons. Also the "In Motion" theme lacked pizzazz. Luckily we can easily apply new themes and layouts to individual pages or to all the pages. Site Designer lets the Webmaster make the changes immediately and get feedback from the client.
I decided to apply the new theme and layout to all pages at once. First, open the Site Diagram and expand all subtrees. Then on the Site Diagram window, select all pages by pressing <ctrl> A or by clicking Select All in the Edit menu. All selected pages are now outlined in red.
Next, right click on any selected page and choose Apply Theme and Layout … from the menu. From the dialog box, select a new theme and also select a new layout. I've selected "Cactus" as my theme and "Top, Left, Bottom 1" as my new layout.
Click OK to apply the new layout and theme. Now, preview a page in the browser to see the effect of the changes. (Make sure you deselect all pages and select a single page or you will preview all pages, each one in a separate copy of Internet Explorer).
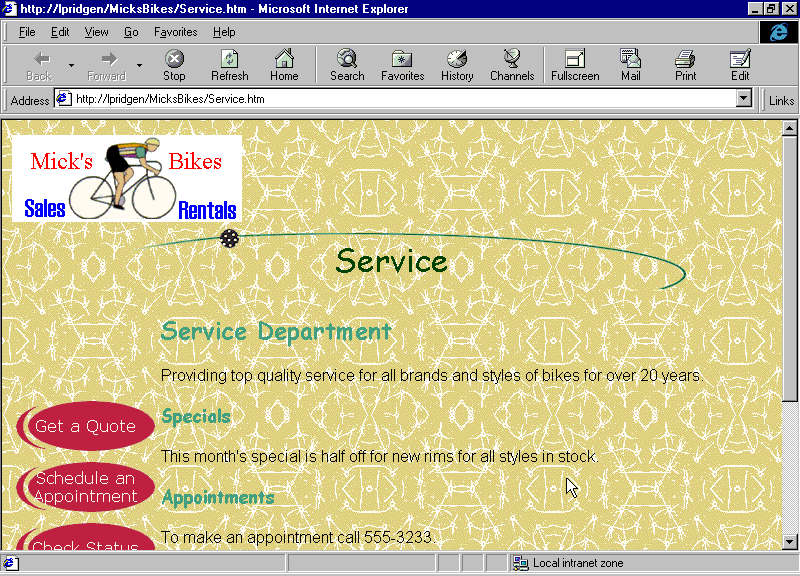
Figure G: This shows our Service page with the new theme and layout applied. Notice the redundant Service and Service Department banners.
You may find that you will now have to rearrange or change your content because it doesn't work well with the new theme. For example, in my previous theme I explicitly created a banner describing the content of the current page, ie. "Service." However the new theme has such a banner built in, so leaving the content alone would have presented "Service" to the user twice.
Figure H shows our page after we've deleted the "Service Department" content. The new theme also has buttons rather than text navigation toolbars, which should make Mick happy. Visual InterDev 6 also allows you to create your own themes and layouts, but that is a topic for another day.
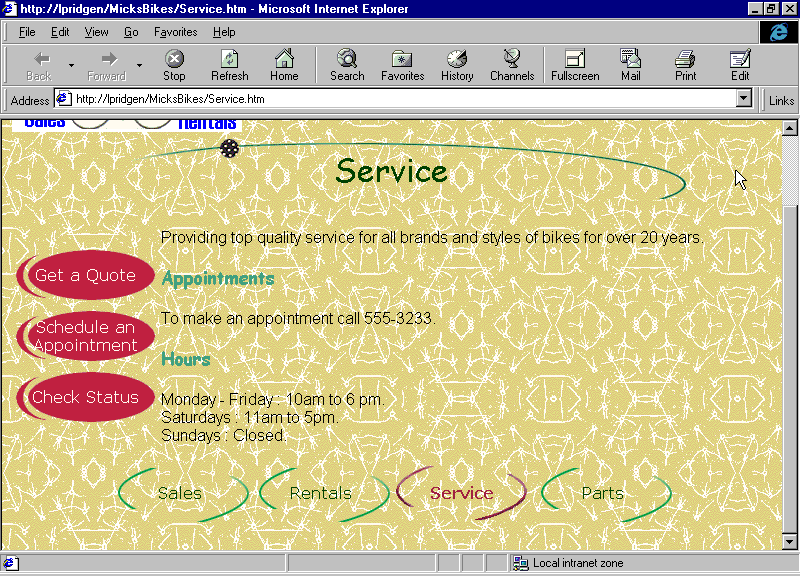
Figure H: The new theme has buttons instead of text navigation toolbars.
Creating multiple Site Diagrams for a single Web site
As your site grows, you will probably find it cumbersome to keep all your site hierarchy on one Site Diagram. As the number of pages grows, you will probably finding yourself spending more time expanding and contracting subwebs than actually working.
Also, it may be necessary to keep separate themes and layouts for your particular subwebs. For example, you may have an extranet site that uses a different look from your main site. One solution to this dilemma—without creating completely separate sites—is to create extra Site Diagrams for these logical subwebs.
To add another Site Diagram to your project, select Add Web Item from the Project main menu and then select Site Diagram from the submenu, as shown in Figure I. On the next dialog box, give your new Site Diagram an appropriate name and click OK.
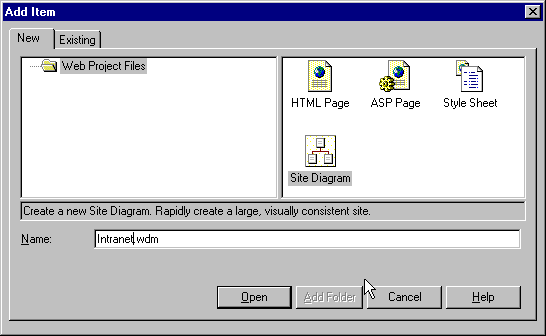
Figure I: Adding another Site Diagram to an existing site.
To move subwebs from the original Site Diagram to the new one, open both Site Diagrams and tile them horizontally using the Window main menu. Now, as shown in Figure J, drag the root item to the new Site Diagram and all of its leaves will be copied as well. Now you can remove the subweb from the original Site Diagram by selecting all items in the subweb, right clicking on one of them and choosing Remove. You can also use the Site Diagram toolbar to remove items from that particular diagram or to delete them from the Web (Figure K).
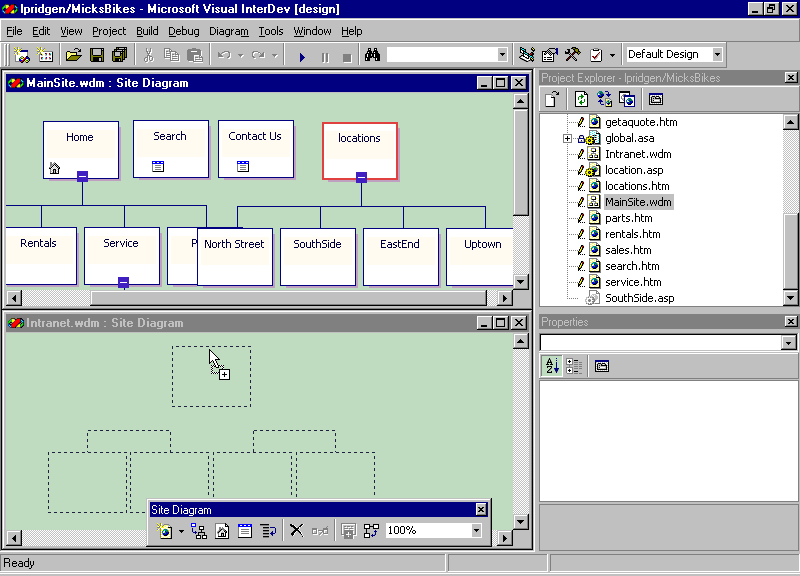
Figure J: Dragging a tree from one Site Diagram onto the other.
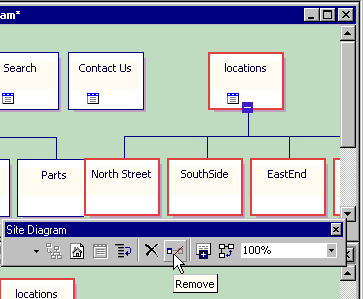
Figure K: The Site Diagram toolbar can also be used to remove items from the Site Diagram or delete them from the Web entirely.
Reorganizing your site painlessly
Pages or whole subwebs can be easily moved from one area of the hierarchy to another by simply dragging and dropping the page or pages to their new location, as shown in Figure L. No changes will need to occur on any of the pages, as the navigation will be automatically updated.
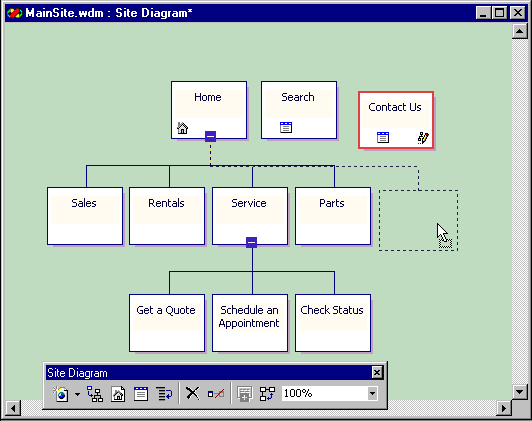
Figure L: Pages can be moved in Site Designer using drag and drop
Conclusion
Visual InterDev 6.0's Site Designer provides many new mechanisms for storyboarding a Web site, organizing your pages, and automatically providing a consistent look and feel to your end users.
Copyright © 1998, ZD
Inc. All rights reserved. ZD Journals and the ZD Journals logo are trademarks of ZD
Inc. Reproduction in whole or in part in any form or medium without
express written permission of ZD Inc. is prohibited. All other product
names and logos are trademarks or registered trademarks of their
respective owners.