Do you spend a lot of time answering the same questions from users? If so, you've probably created a FAQ (Frequently Asked Questions) document and posted it on your network. However, there may be several users who can't find the FAQ (or don't know that it exists) and call you anyway. If you want to make the information in your FAQ more accessible and its use more intuitive, you should consider porting your FAQ over to a Help file.
Most Windows NT users are familiar with Help files and have probably consulted this handy resource many times, typically to find out how to use features of their favorite applications. In fact, most users rely on this convenient online information—rather than printed manuals—as their main source of guidance on all aspects of running a PC. So why not leverage this Help file instinct to your advantage? Contrary to what you might think, Help files are easy to create. You don't need any programming skills, and you don't have to purchase special software.
In this article, we'll show you how to create a basic but effective Help file that you can use to distribute information to your users. We'll finish up by discussing a few resources that address some of the more advanced Help system features so you can develop a more involved Help file.
What you needAs we mentioned earlier, you don't have to buy any special software to create Help files. All you need are two pieces of software that you probably already own or can easily obtain. They are
Once you have the necessary software, you use the word processor to type and format the text you want to distribute. You then use the Help Workshop compiler to convert your RTF document into a Help file.
Getting organizedThe first step in the process is to organize your material into topics. A topic is the basic unit of information in a Help file. It contains all the text you expect to appear in a Help window at one time. (If a topic is too big to fit in the window, the user will be able to scroll to reach other parts of it.) One of the most important rules to keep in mind when creating topics is that you want to limit them to small, easily digestible chunks of information. There's no set limit on the size of a topic, but it's wise to keep it under 50 lines of text (assuming the Help window is about half as wide as your screen).
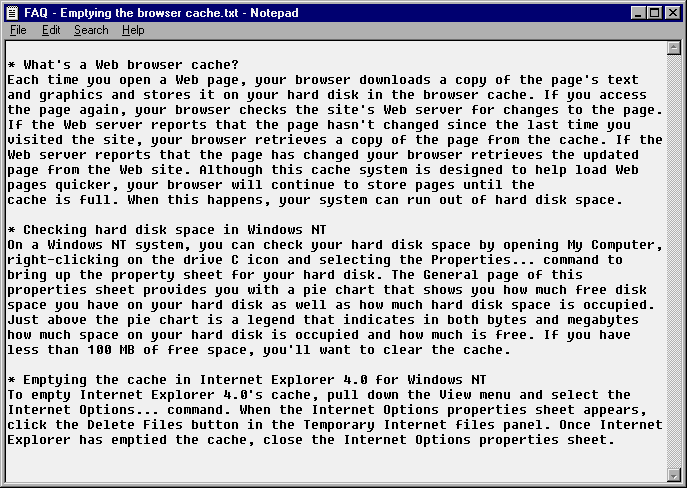
Let's suppose that you get a lot of calls from users who are running low on hard disk space. This usually happens when the Web browser's cache becomes so full that there's no room on the hard disk for saving documents. To help your users solve the problem on their own, you've created the FAQ text file shown in Figure A, which explains what a cache is, describes how to check hard disk space, and shows how to empty the cache. Now, you'd like to convert the FAQ into a Help file so that your users can have easy access to it.

Creating the topics file
Once you've organized your information, you're ready to enter your topics in a word processing document and save it using the RTF format. You can include as many topics as you like in the document, and you can place them in any order you want. (If you have a large number of topics, you might find it more convenient to spread them over several document files.)
As you type the topics, you're free to take advantage of whatever fonts, colors, and formats your word processor offers. However, we recommend you keep the formatting as simple as possible. Your aim is to convey information, not to impress the user with fancy visual effects. Therefore, you should try to limit yourself to one or two fonts, and be sparing in your use of colors and text styles.
Now that we've set the guidelines, let's walk through an example. Suppose you're using the text in Figure A as your FAQ and Word 97 as your word processor. You simply need to copy the text from your FAQ and paste it into a Word 97 document. You can then change the font to Arial (or another font, if you prefer), bold the headings, and save the document as an RTF file.
Creating the contents topicThe next thing you'll want to do is create a contents topic, which will act as the table of contents for your Help file. (Keep in mind that the contents topic is different from the Windows NT Help system contents file—CNT—even though it performs the same function.) The contents topic will contain jumps, or links, to the various topics in your Help file.
In our example, we'll use each topic's heading to compile the contents topic. Simply type
What's a Web browser cache?
Checking hard disk space in Windows NT
Emptying the cache in Internet Explorer 4.0 for Windows NT
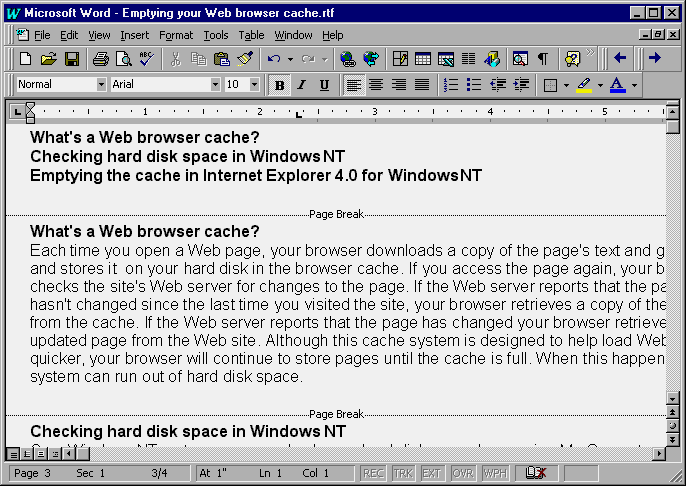
above the first topic in your document, as shown in Figure B.

At this point, you need to separate each topic in your topic file with a hard page break. This code tells the Help Workshop compiler where one topic ends and the next one begins. The compiler will ignore soft page breaks (which the word processor inserts automatically).
To insert the first hard page break, place your insertion point marker in front of the word What's, pull down the Insert menu, choose the Break… command, select the Page Break option, and click OK. Repeat this process to insert a hard page break before the words Checking and Emptying, as shown in Figure C.
Once you've separated your topics with hard page breaks, you must assign each topic a special code, called a topic ID, that will uniquely identify the topic to the Help compiler. (You won't assign topic IDs to the contents topic.) Topic IDs can be up to 255 characters long and can contain any combination of letters, digits, underscores, and periods. However, it's best to keep your topic IDs short—less than about 15 characters—and to stick with names or phrases that will remind you what the topic contains. For our example, we used WhatIs, HardDiskSpace, and EmptyCache.
To assign a topic ID, first position the insertion point marker at the beginning of a topic. Next, using your word processor's footnote feature, insert a footnote with a number sign (#) as the reference symbol, and then type your chosen topic ID as the footnote text.
In addition to assigning a topic ID, you should give each topic a title. This step isn't mandatory, but if you omit the title, the topic won't show up in some common Help file operations, such as when you define a bookmark. Topic titles can contain any character, including spaces, in both uppercase and lowercase. You insert the topic title in the same way you do the topic ID, except that you use a dollar sign ($) as the footnote reference symbol. Figure D shows our sample document after we inserted the first topic ID and topic title. You'll create a topic ID and topic title for each of the other two topics in our example.

Creating jumps
Next, you need to provide a method of navigating between your contents topic and the actual topics. The most common way of linking topics in a Windows Help file is to use jump text (also known as a hypertext link). In our sample document, you'll create jumps from each of the headings in the contents topic to the appropriate topic.
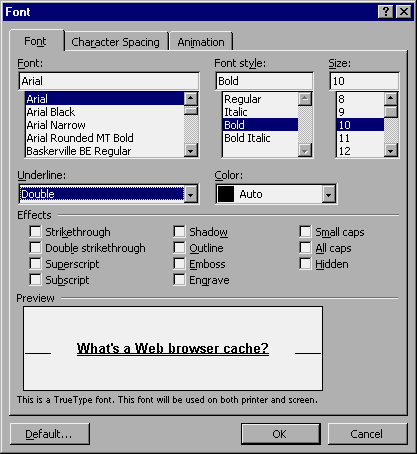
To create the appropriate jump text, begin by scrolling to the first heading in your contents topic, What's a Web browser cache? Then, apply a double-underline format to that text. To do so, highlight the heading, pull down the Format menu, choose Font…, select Double from the Underline dropdown list, as shown in Figure E, and click OK. Now, place the insertion point marker immediately to the right of the heading and type the ID of the topic you want to jump to (in our case, WhatIs). Finally, format the ID as hidden text by highlighting it, accessing the Font dialog box again, and selecting the Hidden check box in the Effects panel. Be sure that there's no space between the jump text and the ID and that the ID isn't double-underlined.
Repeat these steps for each of the headers in the contents topic. Finally, save the topic file. Be sure to save it in rich text format.
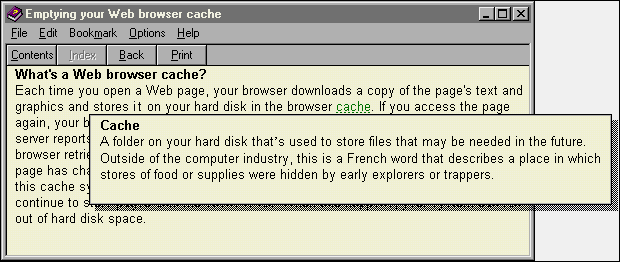
Creating pop-upsIf your Help text contains an unusual technical term for which you want to supply a definition, you can use a pop-up. In Help documents, text formatted in green with dotted underlining indicates a pop-up. When the user clicks this type of text, a window opens and displays a definition. When the user clicks again, the pop-up window closes, leaving just the main Help window onscreen.
You create a pop-up window in the same way you create a topic. In fact, although it's not obvious to users, a pop-up window is a topic in its own right. You'll probably want to enter a pop-up's text in the same document as the topic where it will be flagged. To keep the document in manageable form, you can insert the pop-up text after the topic it refers to.
To create a pop-up topic, locate the term you want to flag, scroll to the next topic, and place your insertion point marker immediately after the hard page break. Then, type the text you want to appear in the pop-up window and insert a hard page break to signify the end of this new topic. Next, assign a topic ID to the pop-up topic. (You don't need to assign a topic title.)
After you've created the pop-up topic, scroll to the item that you want to link to your pop-up and format this text with single underlining. Then, with the cursor immediately to the right of your underlined text, type the ID of the pop-up topic and format the ID as hidden text. Make sure that there's no space between the underlined text and the ID and that the ID isn't underlined.
For example, in our Help document, the word cache might be a little confusing to some users. To create a pop-up definition for this term, you just type the definition as a new topic and assign Cache as its topic ID. Then, you go to the What's a Web browser cache topic?, underline cache, type the ID Cache immediately after it, and format Cache as hidden text. Figure F shows how your text should appear at this point.

Now that you've created your topics file, you're ready to create the project file. The project file is actually a set of instructions that the compiler uses to create the actual Help file. You create a project file in Help Workshop.
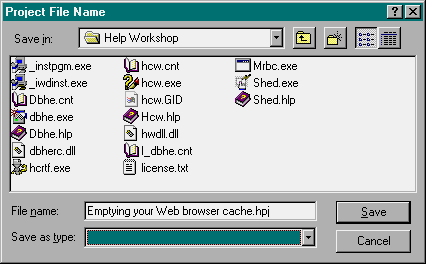
To begin, launch Help Workshop, pull down the File menu, and select the New… command. In the resulting dialog box, make sure that Help Project is selected and click OK. When the Project File Name dialog box appears, type the name you want to assign to the HLP file in the File Name text box, using the extension .hpj. For our example, we'll use the same filename as the RTF file, as shown in Figure G.
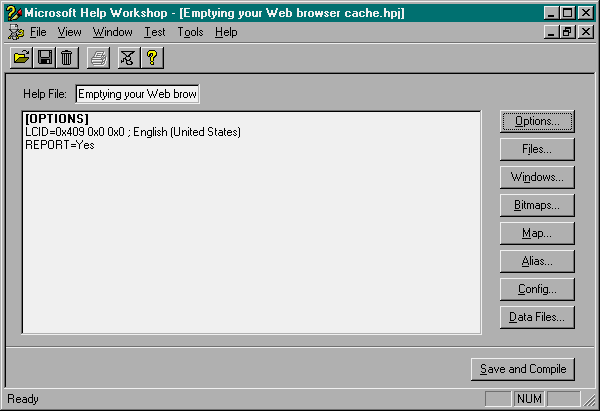
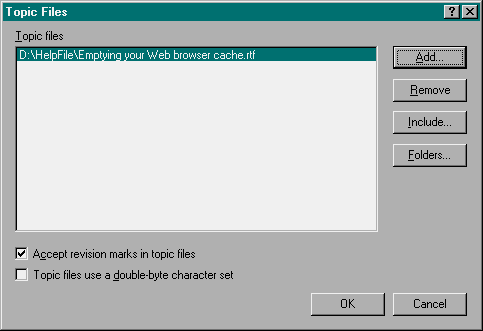
When you click the Save button, Help Workshop will display the initial project file in its window, as shown in Figure H. At this point, you need to tell Help Workshop where to find your RTF file. To do so, first click the Files… button. Then, click the Add… button and in the resulting dialog box, select your RTF file. Once you've added the RTF file, the Topics Files dialog box will look like the one shown in Figure I. At this point, click OK.
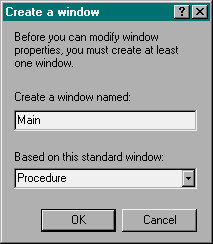
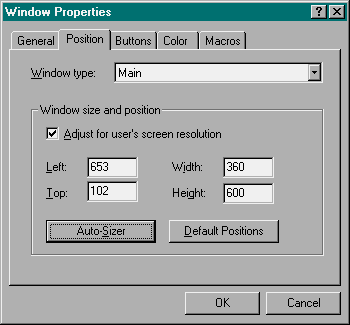
The last thing you'll want to do before you compile your Help file is configure how you want the Help file's window to appear. Start by clicking the Windows… button to open the Create a Window dialog box. Next, type Main in the text box, as shown in Figure J, and click OK. You'll then see the Window Properties sheet, as shown in Figure K. While you can configure many aspects of a Help file's window, for now we'll simply assign the window a name to use in its title bar and specify its size. (Once you become more proficient at creating Help files, you can experiment with some of the other window options.)

Type Emptying your Web browser cache in the Title Bar Text box, then click the Position tab, shown in Figure L. Use the Auto-Sizer button to specify how large you want your Help window to be (following the Auto-Sizer window's onscreen instructions). Finally, click OK to close the Window Properties sheet.
When you return to the project file display, click the Save and Compile button. Help Workshop will minimize itself, compile the project file, and then display a compilation report, as shown in Figure M.
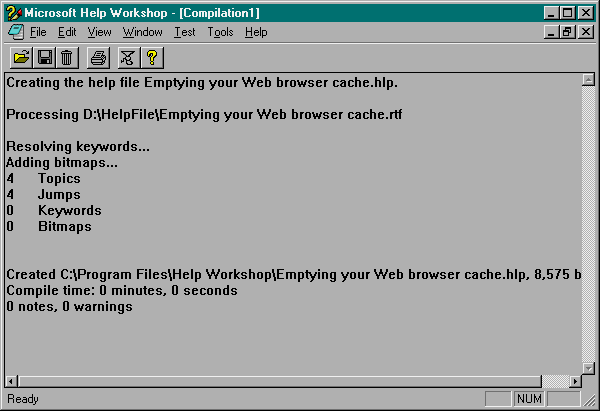
If your compilation report indicates any errors, you'll need to resolve them and recompile the project file. Each error condition is denoted by an error code using the format hcxxxx, where xxxx is a number. For aid in solving your errors, pull down the Help Workshop's Help menu, select Help Topics, click the Index tab, type the error code in the text box, and click Display. Once you've found a solution, you can close Help and then return to your word processor, make the proper adjustments to the RTF file, resave it, return to Help Workshop, and click the Save and Compile button to recompile your project file.
Testing your Help fileOnce your project file compiles successfully, you can test your Help file by pulling down the File menu and selecting the Run WinHelp… command. When the View Help File dialog box appears, select the A Double-Clicked File Icon option, as shown in Figure N, and click the View Help button.

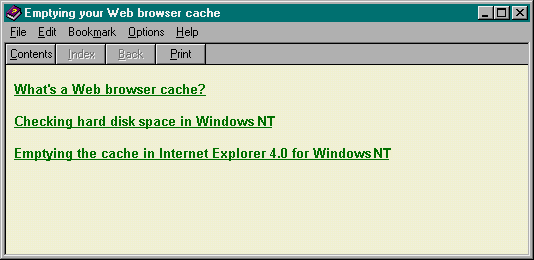
You should now see your contents topic displayed in the Help program's window, as shown in Figure O. If you follow the What's a Web browser cache link and then click on the underlined word, your screen will resemble the one shown in Figure P. When you're satisfied that your Help file works the way it should, you can close the test window and then close Help Workshop.
At this point, you can copy the actual Help file to a central location and send links to it to your users. That way, if you ever need to add information to the Help file, you have to do so only once, and the changes will be available to all your users.
Creating more advanced filesThe techniques we've shown you in this article will allow you to create basic, effective Help files. But with a little practice and study, you can take what you learn here and develop more advanced Help files. A good place to start learning some of the more advanced Help system features is in Help Workshop's own Help file. Just pull down the Help menu, select Help Topics, and study the information presented on the Contents tab.
If you prefer printed material, you can invest in the Microsoft Windows 95 Help Authoring Kit from Microsoft Press. (Don't let the title throw you; it's the same Help system that was developed for Windows 95 is in use in Windows NT.) This 336-page book will provide you with everything you need to know about creating basic and advanced Help files. The book sells for $49.95 and includes a CD that contains the Help Workshop compiler. For more information on the Microsoft Windows 95 Help Authoring Kit, go to the Microsoft Press Web site (mspress.microsoft.com/Buy/Search.htm) and perform a search using the keywords Help Authoring.
If you're really into creating Help files, you might want to investigate such powerhouse programs as Blue Sky Software's RoboHELP or Doc-to-Help from WexTech Systems. You can find out more about RoboHELP at Blue Sky Software's Web site at www.blue-sky.com; for more information on Doc-to-Help, visit WexTech's Web site at www.wextech.com.
ConclusionMost Windows NT users are familiar with Help files and rely on them heavily to learn about software. You can leverage this familiarity and create your own Help files to disseminate information your users need to know. In this article, we've explained which tools you need to build Help files, and we've shown you how to create a sample Help file.
Copyright © 1998, ZD
Inc. All rights reserved. ZD Journals and the ZD Journals logo are trademarks of ZD
Inc. Reproduction in whole or in part in any form or medium without
express written permission of ZD Inc. is prohibited. All other product
names and logos are trademarks or registered trademarks of their
respective owners.