

In this article, we'll show you how to create and configure a sample database using the SQL 7.0 Server Enterprise Manager. We'll also show you how to add the appropriate users--with the appropriate rights--so the data will be accessible to the Web server.
Getting started
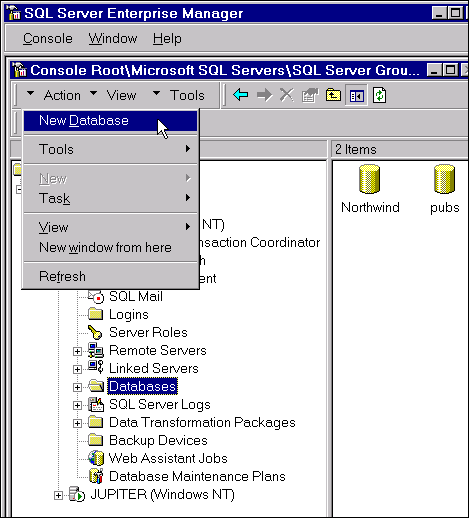
The first thing you'll want to do is create a new SQL database. To do this, launch the Enterprise Manager from the Microsoft SQL Server 7.0 menu. Expand the SQL Server Group node and then expand the node for your SQL server. Highlight the Databases icon and select New Database from the Action menu item, as shown in Figure A.
Figure A: Use the SQL Server Enterprise Manager to create and modify your databases.
In the Database Properties dialog box that appears, enter a name for your new database. As seen in Figure B, the sample database is named WEBPAGES.
Figure B: Note that you don't need to specify a size for the database.
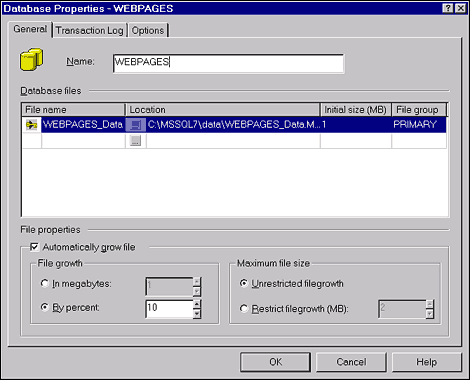
One of the most powerful features of SQL 7.0 is shown in this dialog box: you don't have to specify a database size, only an initial size. SQL 7.0 will automatically expand your database file, as it needs to, either by set size increments or by a percent of the current database size. You can leave the defaults and click OK to create the new database.
Adding users
Next, you must configure the new database to allow users to access it. You'll want to give access to at least two users: the user that runs the Web server and the Webmaster. Each of the users will have different access needs, so we'll want to configure the database users to reflect this.
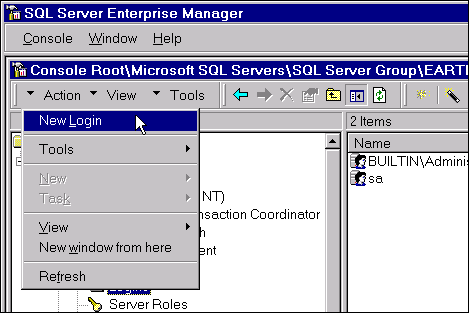
To add new database users, you first need to create server logins. To do this, highlight the Logins icon under your server node and select New Login from the Action menu, as shown in Figure C. This will launch the SQL Server Login Properties - New Login dialog box.
Figure C: You'll need to create two logins to allow Web users and administrators access to the database.
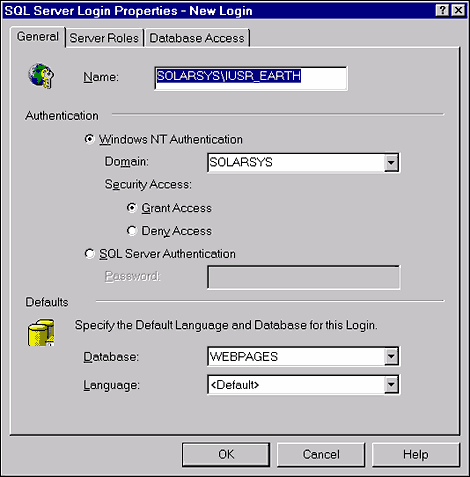
In this dialog box, you'll first need to select the Windows NT Authentication radio button and select your Domain from the dropdown list. Next, complete the user name in the Name edit box. You can't browse for a user name, so you'll need to know the name of the Web server user. By default, the Microsoft Internet Information Server (IIS) runs as the user IUSR_ServerName. The sample server user is IUSR_EARTH, as EARTH is the name of our SQL server.
Once you've entered the user name, you'll need to specify the default database and language. Configure these options as they're shown in Figure D.
Figure D: Setting just the default database to the WEBPAGES database won't give the new login access.
Before you click OK, you'll need to give the user access to the WEBPAGES database by clicking on the Database Access tab, and checking the options shown in Figure E. Once you've completed this, click OK to create the user login.
Figure E: To give the login access, you need to give access on the Database Access tab, as well.
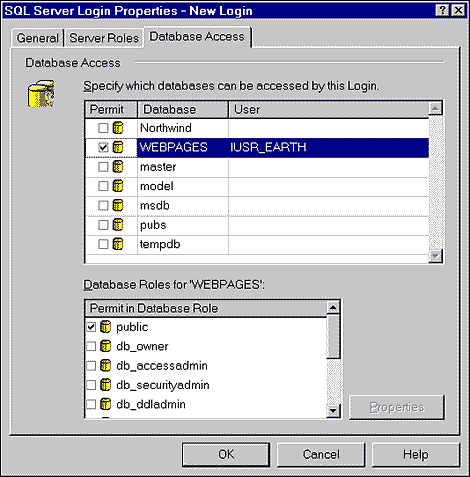
Repeat this process for the Webmaster account. There's no default Webmaster user, so you may need to find out which account is used to administer the Web pages before creating this login. The only difference you'll make between the process for creating the Web server login and the Webmaster login is that you'll give the Webmaster the db_owner role, in addition to the public role assigned to the Web server login.
Assigning table user permissions
Now, you'll need to create a database table. To do this, highlight the Tables icon under the WEBPAGES database node, select Action | New Table, and complete the New Table dialog box. You'll need to add at least one column to your table before you can save it, but you should have a sound database design for your Web data before creating your tables.
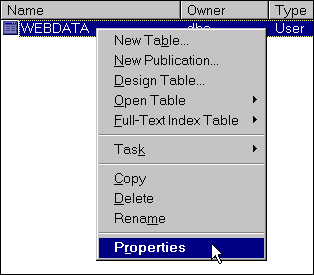
For the sample database, we created a table named WEBDATA. To assign the rights to each user, right-click the table you just created and select Properties from the shortcut menu, as shown in Figure F. From the Table Properties dialog box, click Permissions to launch the Object Properties dialog box.
Figure F: You'll need to set the Permission on each table access by the Web applications.
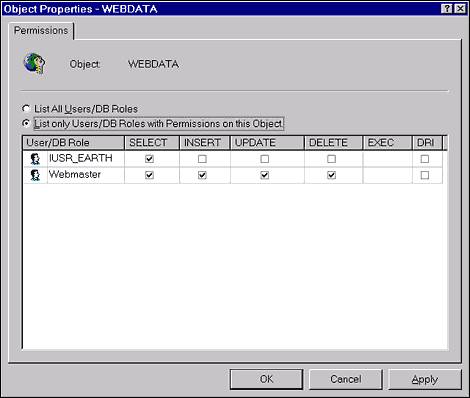
In this dialog box, you'll need to assign permissions, so the two Web users will be able to access the data in the database. For the Web server user, IUSR_EARTH in the sample database, you should give only SELECT permissions. Remember, the IUSR_ServerName user is the default Web server user. Any time the Web server accesses the database without forcing a user to log in, it will be doing so as IUSR_ServerName. For the Web administrator, you can give SELECT, INSERT, UPDATE, and DELETE permissions. This will provide the Webmaster with all the power he needs to create Web-based database administration applications. When you've finished, you should have a dialog box similar to the one shown in Figure G.
Figure G: Creating two users with two sets of rights allows Web developers to create applications to administer the database from the Web while not allowing just any user to do so.
Conclusion
As databases become more and more powerful, and server technology advances to take advantage of them, database administrators need to know how to create Web-specific databases and tables. We've shown you one way to create and customize a database for use on the Web, and while there are others, this simple process should serve most of your needs.
Copyright © 1999, ZD Inc. All rights reserved. ZD Journals and the ZD Journals logo are trademarks of ZD Inc. Reproduction in whole or in part in any form or medium without express written permission of ZD Inc. is prohibited. All other product names and logos are trademarks or registered trademarks of their respective owners.