
The process
In the simplest case scenario, this process is fairly straightforward. First, you display a slide that contains the image you wish to add a hyperlink to. This can be practically any type of image: clip art, photographs, organization charts, graphs, technical drawings, and so on. After you display the objects for your image map, you use PowerPoint's Action Settings command to assign a destination slide to each object. Then, use the Action Settings command again to create links that return you to the original slide. If you want, you can hide the destination slides so that you (or someone viewing the presentation independently) don't stumble over the same information a second time as you advance through the slides.
You can also use the Action Buttons command to insert a button that jumps to the previous or next slide. However, when you use this technique, the buttons actually appear on the slide. We want to create an image map from an element that's already part of our slide, so let's take a look at a simple example to get a feel for how this process works.
Simulating an image map
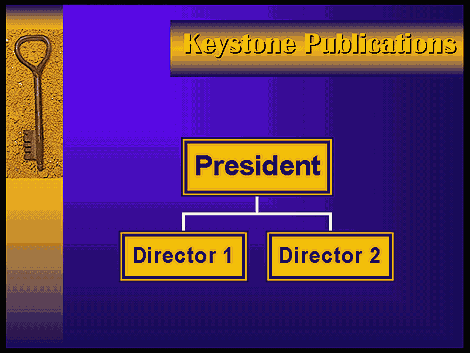
Figure A shows an organizational chart that features the top tier of a business unit. As you might imagine, subordinate positions branch down from the two director levels, but rather than crowd all the information onto one slide, we've created separate slides for each director. Figure B shows a slide containing a second org chart. This one focuses on the hierarchy headed by Director 1. Let's assume that you want to display this supplemental slide when you click on the box that represents Director 1 on the first slide. In addition, you want to be able to return to the first slide by clicking on the Director 1 box on the supplemental slide.
Figure A: We'll set up a link that lets us view the subordinate
positions not shown in this chart.
Figure B: Our link takes us to this slide, which shows the
employees who report to Director 1.
Creating the link
Before we begin, create a simple organization chart, like the one shown in Figure A, using the Organization Chart AutoLayout. Then, create a supplemental slide following the main organization chart for the Director 1 position. Use Figure B as your guide. Once you've completed the main chart and the supplemental slide, the first step is to set up the link for the Director 1 box on the first slide. Since we're assigning the action setting to one specific portion of the org chart, we must confine the link to the Director 1 box.
In order to do this, we'll ungroup the chart so that we can work with its components separately. To do so, right-click on the org chart and select Grouping/Ungroup from the resulting shortcut menu. PowerPoint displays a dialog box indicating that the org chart is an imported object and data will be lost if you ungroup it. Click Yes to execute the Ungroup command and dismiss the dialog box. Now we can create an image map from the Director 1 box using an action setting.
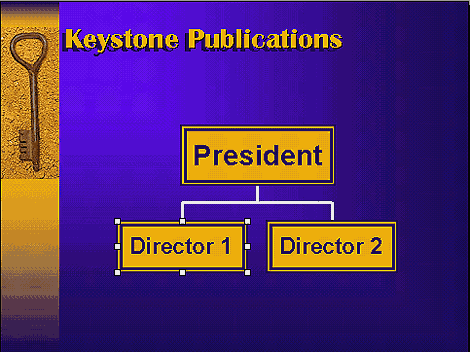
To assign an action setting, first click outside the selected area to deselect the objects, and then click on the Director 1 box to select it, as shown in Figure C. Choose Slide Show/Action Settings from the menu bar to display the Action Settings dialog box, and then click on the Mouse Click tab. You can also right-click on the box and select Action Settings from the shortcut menu.
Figure C: Once you ungroup the chart, you can select individual
components and add a link.
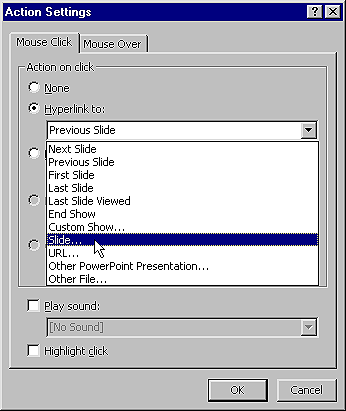
In the Action Settings dialog box, select the Hyperlink To option. For this example, let's assume that the supplemental org chart for the Director 1 position appears after the master org chart slide. (We'll hide that supplemental slide in a minute, so you don't have to worry about redisplaying it as you advance through the presentation.) To set the destination for the Director 1 link, simply choose Slide from the Hyperlink To dropdown list, as shown in Figure D. In the Hyperlink To Slide dialog box, select slide number two, then click OK.
Figure D: To link the image map to the appropriate slide, choose
a setting from the Hyperlink To dropdown list.
As you can see, PowerPoint provides an option for every contingency. For example, you can hyperlink to a slide relative to the current one (next, previous), the first or last slide in the show, the last slide you viewed, a specific URL, or you can end the show. In addition, you can select the Slide option to access a list of all the slides in your presentation. You can then select a specific slide as your destination.
Finding your way back home
Once you've established the link between the Director 1 box and the supplemental org chart slide, you need to create a way to return to your master org chart. Start by displaying the supplemental slide. Next, ungroup the chart as we did previously so you can create an image map from the supplemental slide back to the master org chart. Once you ungroup the chart, select the main box (Director 1 box in this example) and choose Slide Show/Action Settings from the menu bar. In the Action Settings dialog box, select the Hyperlink To option and choose Previous Slide from the Hyperlink To dropdown list. Finally, click OK to apply the setting and return to your slide. Before we try out the link, we need to take care of one final chore: hiding the supplemental slide. To do this, choose Slide Show/Hide Slide, and then save your presentation.
Test the results
To test the link, first display the master org chart slide. Then, select Slide Show/View Show from the menu bar, or simply press [F5]. Next, position the mouse pointer over the Director 1 box. When the pointer changes to a hand, click on the box. PowerPoint then displays the "go to" slide, which in this case is the supplemental org chart for Director 1. To return to the original slide, position the mouse pointer over the Director 1 box and click once the hand pointer appears.
Final thoughts
We kept our example simple to demonstrate the fundamentals of this technique, so it might seem like we've gone to a lot of trouble just to display the next and previous slides in a presentation. However, if you imagine a slightly more complex scenario, the advantage of PowerPoint's action settings becomes more apparent. For example, suppose you have a set of 15 hidden slides designed to augment a kiosk presentation. By assigning these slides to particular image maps throughout your presentation, you can leave it up to the individuals viewing the show to selectively display the supplemental information. Or, perhaps you're delivering a presentation and don't want to proceed through the slides in a linear fashion. If you create an image map with links to all your slides, you can easily bring up any slide at any point in your presentation simply by clicking on the appropriate link.
Copyright © 1999, ZD
Inc. All rights reserved. ZD Journals and the ZD Journals logo are trademarks of ZD
Inc. Reproduction in whole or in part in any form or medium without
express written permission of ZD Inc. is prohibited. All other product
names and logos are trademarks or registered trademarks of their
respective owners.