 To run Registry Checker (ScanRegW)
This section describes how to get started with the tools that you can use to display, modify, back up, and recover the registry.
Registry Checker is a system maintenance program that finds and fixes registry problems. Each time you start your computer, Registry Checker automatically scans the registry for inconsistent structures, and if no problem is found, Registry Checker makes one backup for each day. Registry Checker consists of two executable files, Scanreg.exe and Scanregw.exe, which are automatically copied to the \Windows\Command and \Windows folders, respectively, when Windows 98 is installed.
If a problem is found in the registry, Registry Checker can restore the registry from a good backup copy. Registry Checker maintains five compressed backups of the registry that have successfully started the computer. Registry Checker attempts to fix the registry if a backup cannot be found. Registry Checker also removes unused space in the registry, reducing the size of the registry file, and therefore improving performance.
Once per day at startup a new CAB file containing a backup of the registry is created by Registry Checker. The file name is Rbxxx.cab (where xxx is a unique number assigned when the file is created). The new file replaces the oldest file. These files are located in the \Windows\Sysbckup folder (a hidden folder). Registry Checker always maintains at least the last configuration from which the system was successfully booted.
The Registry Checker utility is actually two executable files: Scanreg.exe (ScanReg) is a real-mode, MS-DOS executable file and Scanregw.exe (ScanRegW) is a protected-mode, Windows executable file. They store copies of the entire registry, both User.dat and System.dat, as well as Win.ini and System.ini, into a compressed file (filename.cab).
ScanRegW scans the registry for corruption and determines if it requires optimization, and then backs up the following system configuration files: User.dat, System.dat, Win.ini, and System.ini. This scan occurs automatically when the system is started. On the first successful boot, a CAB file is created and marked as a registry backup that is capable of booting the system. You can run ScanRegW when you want to force a scan and backup of these files. ScanRegW backs up the registry and configuration files using the Rbxxx.cab file.
To run Registry Checker (ScanRegW)
ScanReg runs when ScanRegW detects a problem with the registry and it prompts you to restart the computer to fix the problem. ScanReg either restores the registry from a known good backup, or, if no backups are available, it repairs the current registry. If ScanRegW detects that optimization is required, ScanReg optimizes the registry on the next startup. With some severe types of registry damage, Io.sys will detect the problem and the MS-DOS mode configuration menu appears, warning you that a registry corruption has been detected.
For more information about how to run ScanReg, see "Backing up and Restoring the Registry" later in this chapter.
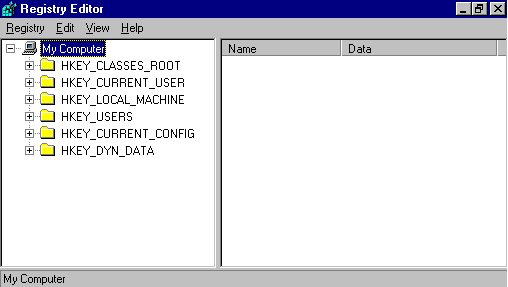
Registry Editor is a tool for displaying and editing the registry database. Registry Editor (Regedit.exe) is copied to the \Windows directory automatically when Windows 98 is installed.
Caution
Making a mistake in editing the registry can cause your system to become unstable and/or unusable.
Wherever possible, use the administrative tools, such as Control Panel or System Policy Editor, to make configuration changes, rather than editing the registry. This is to ensure values are stored properly in the registry when changing the configuration.
If you use Registry Editor to change values, you will not be warned if any entry is incorrect. Editing the registry directly by using Registry Editor can cause errors in loading hardware and software, and can prevent users from being able to start the computer.
To run Registry Editor
Both mouse and keyboard commands can be used to navigate in Registry Editor.
To find specific data in the registry
– Or –
From the Edit menu, click Find. Then type all or part of the text string you want to find, and click options to specify whether you want to find a key name, a value name, or data.
After Registry Editor finds the first instance of the text string, you can press F3 to search for the next instance.
Registry Editor can be used to view or modify a registry on a local computer or on another computer over a network. Both the administrator’s computer and the remote computer require the Microsoft Remote Registry service to allow remote registry access.
For more information about the Microsoft Remote Registry service, see "Managing Remotely" later in this chapter and Chapter 23, "System and Remote Administration Tools."
Tip
The network administrator can restrict users from being able to use Registry Editor to modify the registry by setting a system policy named Disable Registry Editing Tools. However, this policy does not prevent the administrator or another user from modifying the registry by using System Policy Editor.
For more information about this restriction and about using System Policy Editor to modify the registry on individual or multiple computers, see Chapter 7, "User Profiles," and Chapter 8, "System Policies."
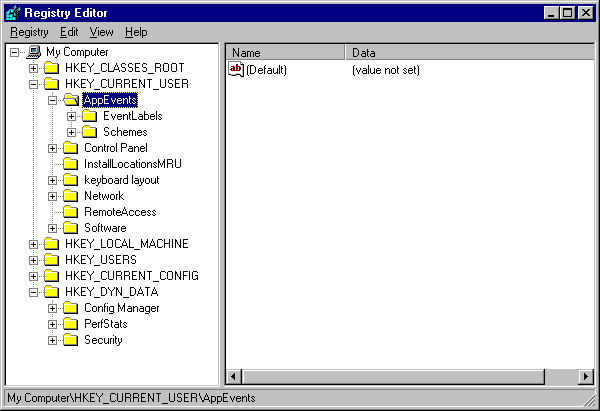
The values of the active key appear in the right pane of the Registry Editor window. Each key contains at least one value with the name Default. Each additional value for a key must have both a name and a data value.
Valid characters to include in a name are A through Z, 0 through 9, blank, and underscore (_). The values appear under Data. In Windows 98, the size of the subkey is unlimited. For better efficiency, use a file to store large amounts of data (subkeys over 64 KB), and then maintain a pointer to this file in the subkey. Individual values within a subkey are restricted to 16 KB of data.
The Registry Editor can handle the data types shown in Table 31.3.
Table 31.3 Windows 98 registry data types
| Data type | Description |
|---|---|
| String | Stored as characters enclosed in quotation marks, it is a variable length, null-terminated set of characters. |
| Binary | Represented as a sequence of hex bytes (0–9 and A–F), a defined value can be 1 KB–16 KB in size. |
| DWORD | A binary value that is restricted to 4 bytes, and the value is shown in both hexadecimal and decimal formats: 0x00000000 (0). The first number, 0x00000000, is the hex representation of the value, and the number in parenthesis, (0), contains the decimal representation. |
If the Default entry contains no value, the following string is shown:
(value not set)
The representation and meaning of the value’s data depends on the key. A binary sequence can be interpreted as a single byte, a double byte, or a byte sequence. Some numerical values are stored as strings.
Important
Before modifying registry values, always back up your system. See "Backing Up and Restoring the Registry" later in this chapter.
To change any value
Table 31.4 Registry Editor value types
| Value type | Description | ||||
|---|---|---|---|---|---|
| Text value | The Edit String dialog box appears. Type a new value into the Value Data box. Text values are automatically displayed in quotation marks ("") and the new value is stored immediately in the registry. | ||||
| Binary value | The Edit Binary Value dialog box appears with the value data in hexadecimal format. Select a value to type a new value. When you click OK, the value is stored in the registry. | ||||
| DWORD | The Edit DWORD Value dialog box appears. Select a Base option, and enter the value into the Value Data box. A DWORD can never exceed 32 bits. | ||||
To add a new value
A new entry called New Key #1 is inserted into the registry. New Value #1 represents the value type you chose in step two.
To delete any entry
Caution
Registry Editor does not have an Undo function. All changes are written directly to the disk. If you want to remove an item from the registry, consider renaming it as opposed to deleting it. However, use caution when renaming because this can affect system functionality.
To rename an entry
Each time a user logs on to a computer, Windows 98 searches the registry under the following key to determine whether the user has a local profile:
HKEY_LOCAL_MACHINE\Software\Microsoft\Windows\CurrentVersion\Profile List
Windows 98 also checks for the user profile in the user’s home directory on the server. If the user profile on the server is the most current, Windows 98 copies it to the local computer for use during the current session, and then it loads the settings in this local copy into the registry. If no local user profile exists, Windows 98 copies the server version to the local computer. If no profile is found, Windows 98 creates a new user profile on the local computer using default settings. If the user does not log on, then Windows 98 automatically uses the default user profile.
You can enable user profiles after Windows 98 is installed, either locally on a single computer or for multiple computers. You can avoid having to go to each computer to enable user profiles by creating a system policy that can be downloaded automatically when the initial Windows 98 installation is complete. For more information about enabling user profiles centrally on multiple computers, see Chapter 8, "System Policies."
To enable user profiles on a local computer after setup
Tip
If you include desktop icons in your user profile, only the shortcuts (icons that represent links) will be available when you log on to the network from another computer. Actual files on your desktop are part of your local user profile only.
To disable user profiles on a local computer after setup
Note
If an application is installed after user profiles are enabled with the option to include the Start menu and Programs in the profile, only the user who was logged on when the application was installed will have an entry for that application on the Programs menu. Other users will have to create shortcuts to the application on their Programs menus.
For more information about using user profiles, see Chapter 7, "User Profiles."
During Startup, Windows 98 reads the data stored in System.dat and in User.dat, which can be different for each user. System administrators customize user settings in User.dat. For example, they might restrict access to certain desktop components or Start menu commands, or change the location of the User.dat file. System policies are a powerful method to manage computers on a network.
The tool for changing these settings is the System Policy Editor, which is shipped on the Windows 98 compact disc.
To install System Policy Editor
To run System Policy Editor
The System Policy Editor can be used to directly access the registry to create and edit POL files.
To access registry settings through System Policy Editor
The Local User and Local Computer icons appear in the System Policy Editor. Using this local mode changes registry entries on the current machine in use. No POL file is created when you use local mode. If a POL file already exists, local changes may be overwritten during the next log on.
If you want to use group policies, you must install that capability on each computer running Windows 98, either when you install Windows 98 using a custom setup script or by using the Add/Remove Programs option in Control Panel.
To set up capabilities for group policies using Add/Remove Programs
Windows 98 Setup places Grouppol.dll in the \Windows\System directory on the client computer, and makes the required registry changes.
For more information about adding the ability to use group policies when installing Windows 98 using custom setup scripts, see Chapter 4, "Automated Installations."
Before you can use individual user profiles, you must enable them in Windows 98.
To enable user profiles
For more information about using System Policy Editor, see Chapter 8, "System Policies."