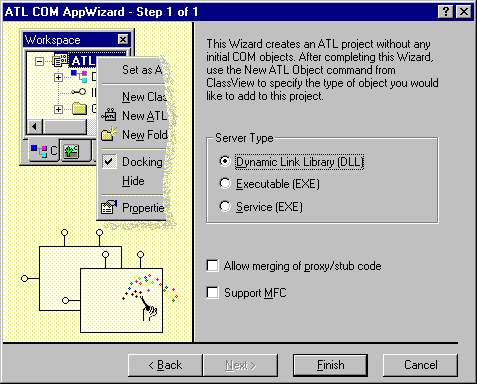


The MinMaxShip component is a Component Object Model (COM) object that exposes a set of COM interfaces to the order processing pipeline (OPP). To create this project in Visual C++ 5.0, you use the COM App Wizard.
Your dialog box should look like this:


A dialog box appears that lists the main files that will be created. These files are listed in the following table, along with a description of each file that the ATL COM AppWizard generates.
| File | Purpose |
|---|---|
| MinMaxShip.cpp, MinMaxShip.h | Contains the implementation of DllMain, DllCanUnloadNow, DllGetClassObject, DllRegisterServer and DllUnregisterServer. Also contains an object map, which is a list of the ATL objects in your project. This is initially blank, because you have not created an object yet. |
| MinMaxShip.def | Standard Windows module definition file. |
| MinMaxShip.dsw | Project workspace. |
| MinMaxShip.dsp | File that contains the project settings. |
| MinMaxShip.idl | Interface definition language file, which describes the interfaces specific to your objects. |
| MinMaxShip.rc | Resource file, which initially contains the version information and a string containing the project name. |
| Resource.h | Header file for the resource file. |
| MinMaxShip.mk | Make file that can be used to build a proxy/stub DLL. You will not need to use this. |
| MinMaxShipps.def | Module definition file for the proxy/stub DLL. |
| StdAfx.cpp | Fill that will #include the ATL implementation files. |
| StdAfx.h | File that will #include the ATL header files. |