Brad Deputy
Microsoft Developer Network
August 1999
Summary: Provides instructions for setting up Phase 4 of the Duwamish Books sample application. (18 printed pages) Covers:
Introduction
Preparing SQL Server 7.0 Installation
Installing English Query
Before Starting the Setup Application
Installing the Database Layer
Installing the Data Access Layer
Installing the Business Logic Layer
Installing the Workflow Layer
"Smoke Testing" the Installation of Duwamish Books, Phase 4
Summary
Note See "Duwamish Books, Phase 4 Setup and Source Code" to download the Setup files for Phase 4.
This article describes the requirements and procedures for installing Duwamish Books, Phase 4 onto one or more servers.
As in Phase 3.5, Duwamish Books, Phase 4 middle-tier components are distributed using the Distributed Component Object Model (DCOM) and Microsoft® Transaction Server (MTS) technologies, enabling the distribution of components and transactions across multiple servers.
The Setup program installs and configures the following four component layers on up to four target servers (one server per layer):
Several prerequisites exist for the servers that host Duwamish Books, Phase 4.
The BLL and DAL servers require the following software:
The WFL requires the components just listed, plus:
The Database Layer only needs:
Note We successfully installed Duwamish Books, Phase 4 on both Windows® 2000 Server Beta 3 and RC1 and on Windows NT 4.0 Server with Service Pack 5, but neither installation has been a focus of our testing.
If you plan to use an existing SQL Server 7.0 installation, you can use SQL Server's default character set, sort order, and Unicode collation settings to run Duwamish—it's not necessary to reconfigure SQL server for the custom settings. (If you are interested in reconfiguring the default character set, sort order, and Unicode collation settings for an existing installation, see http://msdn.microsoft.com/library/psdk/sql/2_002_5.htm).
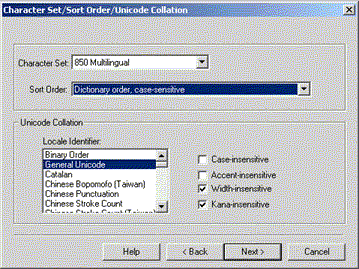
If you are performing a new SQL Server installation, you can configure the custom settings from the SQL Server 7.0 Setup application, using the Character Set/Sort Order/Unicode Collation dialog box (as shown in Figure 1, and described next).

Figure 1. SQL Server 7.0 Character Set/Sort Order/Unicode Collation dialog box
Another SQL Server consideration regards the licensing agreement utilized for the Duwamish Books, Phase 4 Web site. The easiest way to deal with this is by purchasing an Internet Connector License for each processor on the Database layer server (which will provide an unlimited number of concurrent connections). However, the Internet Connector License is not available for intranet deployment. The next easiest licensing model available for intranet deployment is per-server licensing. Unfortunately, per-server licensing is illegal for Web applications that employ database connection pooling (which Duwamish Books does courtesy of ADO). This means that per-seat licensing is the only licensing model available for intranet deployment. The easiest way to ensure you do not exceed the number of CAL purchased for your per-seat SQL Server installation in the Database layer is by limiting the maximum number of IIS connections on the Workflow Layer server. To do this, follow these steps:
Note The location may vary if you do not accept Windows NT 4.0 Option Pack as the default during installation.
Note We ran into a recurring problem during performance testing, wherein warning messages would pop up in the middle of the long-running tests, destroying the test results and indicating the need to create additional CAL. We recommend that you confront this problem early, so as to save yourself time and effort later on.
For more information about licensing strategies, refer to http://www.microsoft.com/backoffice/basics/Licensing.htm and http://www.microsoft.com/sql/70/gen/pricing.htm.
To install English Query, run the autorun.exe program from your SQL Server 7.0 install disc. Select Install SQL Server 7.0 Components and then select English Query.
Before beginning Setup you need to decide whether Duwamish Books, Phase 4 will be configured for one server or multiple servers. Installation onto a single server makes sense for the purpose of exploring the capabilities and general functionality of the application. On the other hand, for enhanced performance and scalability, the components can be installed onto many different servers. If you are interested in reproducing our scalability results, refer to "Performance Testing a Scalable Application" for setup details on the two-server configuration we used in our performance testing.
In order to facilitate installing each layer on a different server, the Setup application must run separately for each layer. For example, in order to install all the Duwamish Books, Phase 4 layers onto a single server, the Setup application is run once per layer.
Before beginning, the Duwamish Books, Phase 4 Setup files (see "Duwamish Books, Phase 4 Setup and Source Code") should be downloaded into a local "setup folder." Where the following instructions refer to running the Setup application, it is assumed the setup folder containing the Setup application is either physically located on each target server, or is available through a shared network location.
Note You must rerun the Duwamish Setup application for each phase of the installation.
Choose the server where the Database layer will be installed and apply the following procedures on that server to install the Database layer.
Run the Setup application to start the database script installation process. Setup begins by copying several temporary files. When the introductory dialog box appears, click OK and read the license agreement. You must "Agree" before continuing. Next, click the Setup button to start the main Setup dialog box (Figure 2).
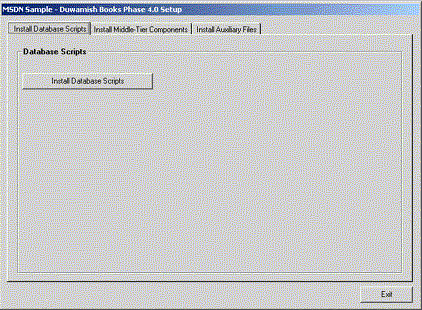
Figure 2. Duwamish Books, Phase 4 main Setup dialog box (Install Database Scripts tab)
Click the Install Database Scripts button to copy the SQL scripts and the MS-DOS batch file that is used to populate the database.
The SQL Server 7.0 Enterprise Manager application is used to create the Duwamish Books, Phase 4 database.
Note The location may vary if you do not accept Microsoft SQL Server 7.0 as the default location during the SQL Server 7.0 installation.
This step populates the DbP4Data database with the various tables utilized by Duwamish Books, Phase 4. Refer to "Duwamish Books, Phase 4 Database Schema" for more information about the Duwamish Books, Phase 4 database structure.
An MS-DOS Command Prompt window should be started to run the MS-DOS format batch file that is provided with the database scripts.
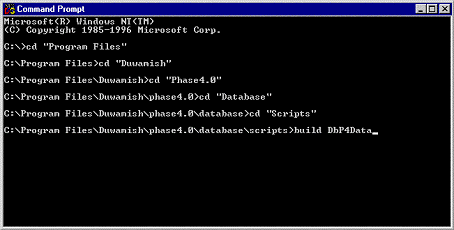
Figure 3. Command Prompt window showing Duwamish Books, Phase 4 database scripts default location
The Microsoft Distributed Transaction Coordinator (MSDTC) and Remote Procedure Call (RPC) Locator services must be configured to start automatically. These services may already be set to automatic startup. If so, you can ignore the following procedure.
To set the MSDTC and RPC Locater to automatic startup
Choose the server where the DAL will be installed and apply the following steps on that server:
Choose the server where the BLL will be installed and apply the following steps on that server:
The Workflow Layer consists of the Workflow component and the Web components. Choose the server where the Workflow component and Web components will be installed and apply the following procedures on that server. This server will host the Duwamish Books, Phase 4 Web site.
The Web components must be installed on the same server where the Workflow component was just installed.
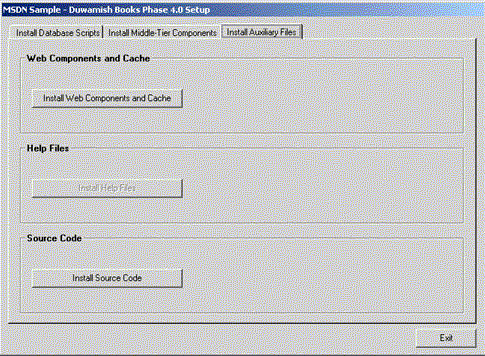
Figure 4. Install Auxiliary Files tab of Duwamish Books, Phase 4 main Setup dialog box
The following instructions should be applied on the Web server where the Workflow component and Web components were installed. The first part of this step (applying the security settings) is optional, whereas the second part (creating the virtual directories) is required.
In order for the Duwamish Books, Phase 4 Web pages to function correctly when a user is not currently logged on to the Web server, the default security settings for the Duwamish Books, Phase 4 Web pages must be modified. The easiest way to accomplish this is by modifying the security settings for all the default Web pages, as described next. If it is preferable to apply these settings only to the Duwamish Web pages, skip directly to the section on "Creating the Duwamish Books, Phase 4 virtual directories," and then apply the security settings to each Duwamish Books, Phase 4 virtual directory.
To be clear, if a user with sufficient security credentials will always be logged on to the Duwamish Web server, it is not necessary to apply these security settings. The decision made at this juncture will determine whether the steps described later in the section "Optional Microsoft Transaction Server (MTS) settings" should also be applied.
Table 1. Duwamish Books, Phase 4 Virtual Directories
| Alias | Directory (using default Web components location) |
| D4_1 | C:\Program Files\Duwamish\phase4.0\clients\web\app1 |
| D4_2 | C:\Program Files\Duwamish\phase4.0\clients\web\app2 |
| D4_3 | C:\Program Files\Duwamish\phase4.0\clients\web\app3 |
| D4_Graphics | C:\Program Files\Duwamish\phase4.0\clients\web\graphics |
| D4_Common | C:\Program Files\Duwamish\phase4.0\clients\web\common |
| D4_Payment | C:\Program Files\Duwamish\phase4.0\clients\web\payment |
| D4_Entry | C:\Program Files\Duwamish\phase4.0\clients\web\entry |
Setup initializes the Duwamish Books, Phase 4 MTS packages for access by the "interactive user." This means a user with sufficient privileges must be logged on to the Duwamish Books, Phase 4 Web server in order for the MTS transactions, and therefore Duwamish Books, Phase 4 itself, to function properly.
If it is not desirable to require that an authorized user be logged on to the Duwamish Web server at all times, the steps described earlier in the section "Applying security settings to the Duwamish Books, Phase 4 Webs site" should be taken, followed by the steps to reconfigure the MTS packages for access by the security credentials of the indicated user, listed next.
If you choose to reconfigure the MTS packages, you are required to do so on the WFL, BLL and DAL server(s). The following steps will modify the BLL package on the BLL server. These same steps should be applied for the "D4VbWFL" package on the WFL server and the "D4VbDAL" package on the DAL server.
Here are some quick tests that can determine whether Duwamish Books, Phase 4 has been successfully installed.
The "D4test.exe" smoke test application, located in the setup folder, can be used to test the DAL and BLL of Duwamish Books, Phase 4. A successful outcome of D4test.exe indicates the BLL and DAL have been installed correctly, and may be expected to function as required by the WFL.
Duwamish Books, Phase 4 is designed using a layered Windows DNA paradigm (see the introduction to the article "Workflow Design for a Web Commerce Application" for a discussion on this), where the successful functioning of each application layer is dependent on the successful operation of any lower layers. Thus, the WFL cannot be expected to function correctly if the BLL is not functioning. Likewise, the BLL cannot be expected to function correctly if the DAL is not installed correctly. And, of course, the DAL cannot be expected to function correctly if the Database layer is not functioning correctly.
Follow these steps to run the D4test.exe application:
Referring to Figure 5, note the two list fields and the two buttons below the fields labeled Test the Business Logic Layer and Test the Data Access Layer. Both list fields should initially be empty.
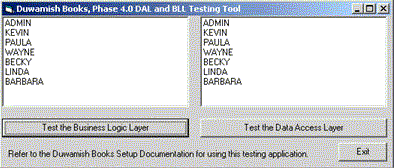
Figure 5. D4test.exe (indicating a successful BLL and DAL installation)
If the DAL test was successful, proceed to the BLL test (step 3).
Once the BLL, DAL, and Database layer have passed muster, it is time to test the WFL for successful installation. The WFL is accessed by the Duwamish Books, Phase 4 Web components, thus the methodology used to smoke the WFL installation is simply to visit a representative range of Duwamish Books, Phase 4 Web pages.
The following steps should be applied on each of the three client approaches, using a range of browsers as necessary. In this article I describe testing client approach 3 using Internet Explorer 5. For a complete smoke test, these steps should also be followed using Internet Explorer 4.x for client approach 2, as well as the full set of client browsers required for client approach 1. Refer to the article "Three Approaches for Three Client Types" for more information about the three client approaches used in Duwamish Books, Phase 4. The screen shots representing the third client approach should look similar for all client approaches.
To test client approach 3 with Internet Explorer 5
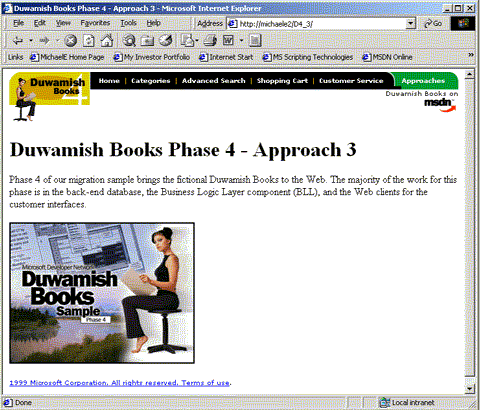
Figure 6. Default page
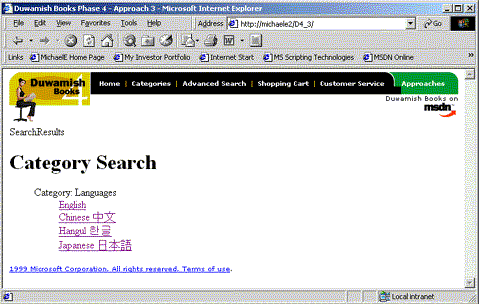
Figure 7. Categories page
Anthropology
Art
Biography
Business
Computers
Cookbooks
Essays
Fiction
History
Literature Critiques
Mythology
Philosophy
Poetry & Plays
Psychology
Reference
Science
Sports
Travel
Dewey Decimal Category
Cannibals and Kings
African Genesis
Forest People, The
Beyond Freedom and Dignity
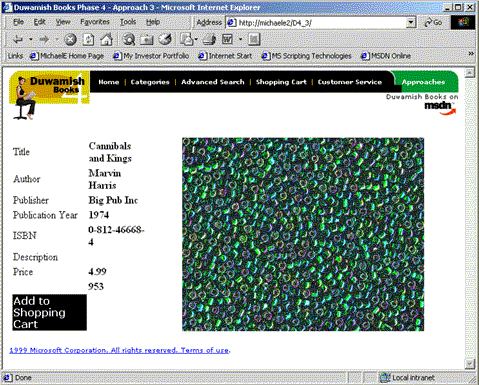
Figure 8. Cannibals and Kings Book (identical in all three approaches)
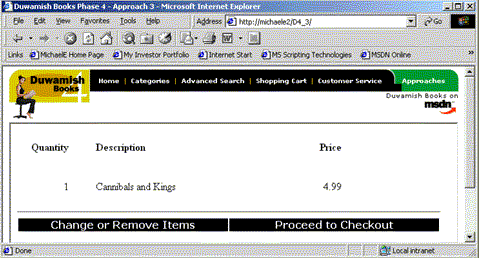
Figure 9. Cannibals and Kings Book added to shopping cart
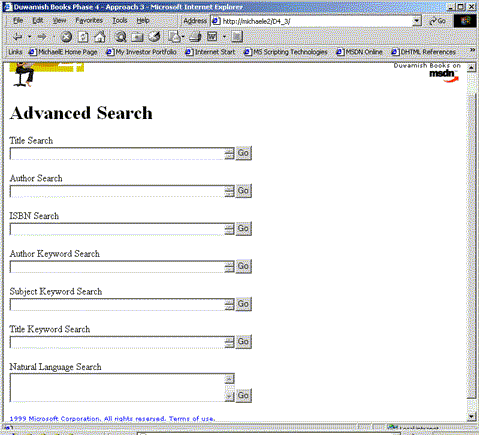
Figure 10. Advanced Search page
Hunt for Red October, The
Another Roadside Attraction
Rosencrantz and Guildenstern are Dead
Canada
Painted Word, The
Old Regime and the French Revolution, The
Napoleon
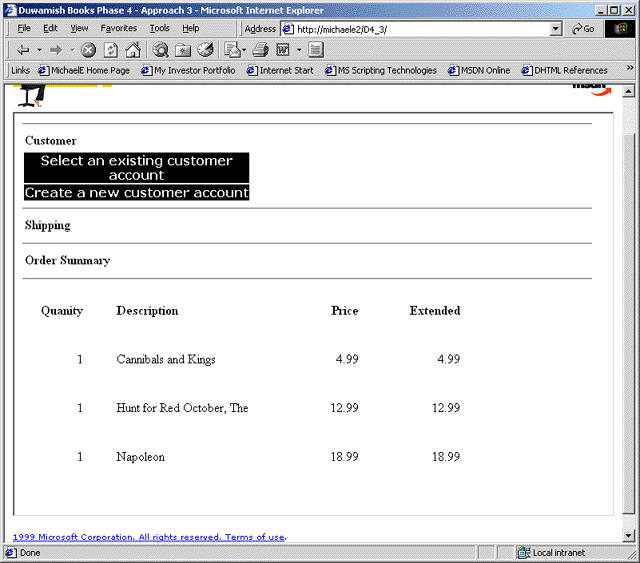
Figure 11. Checkout page with three items in Order Summary
This article provided detailed information necessary to install the Duwamish Books, Phase 4 components on the server configuration of your choice. Additional information was included to help ensure the installation was successful.
While we cannot promise to answer every query, if installation problems are encountered during or after Duwamish Books, Phase 4 Setup, please e-mail us at duwamish@microsoft.com with a detailed description of the problems you encountered, including any error information provided as well as the server configuration selected.