Figure 1. Screen shot of qryProductList : Select Query
Charlie Kindschi
Microsoft Corporation
Applies To: Microsoft Access 97
February 1999
Summary: Discusses how to disable the built-in Send menu item and use the SendObject method of the DoCmd object to control how information is sent. (6 printed pages)
It is usually inappropriate, even dangerous, to e-mail the entire record source that underlies a form. However, users of your Access-based applications can e-mail their data from the DAO object named in the RecordSource property of a form, simply by clicking Send from the File menu. The example in this tip shows you how to disable that built-in Send menu item and instead use the SendObject method of the DoCmd object in conjunction with Microsoft® Visual Basic® for Applications (VBA) code to send only appropriate information and to control how it is sent.
In the Northwind sample database (Northwind.mdb) there is a form called "Products" that is based on a table of the same name. It might be useful to e-mail a list of Northwind's products to potential customers, but the Products table, as a whole, should not be sent. Some fields in the table are irrelevant to customers (such as the Reorder Level), and others are better kept confidential (Supplier Name). Products that have been discontinued should not be part of the list, and a Description field (not currently a part of the Products table) could be added to make the list more compelling.
To see the output that results from using the File menu Send command for the Products form, do the following:
When you open the .xls file from mail, you can see that all fields and all data are available to the recipient—not necessarily a good thing for your company.
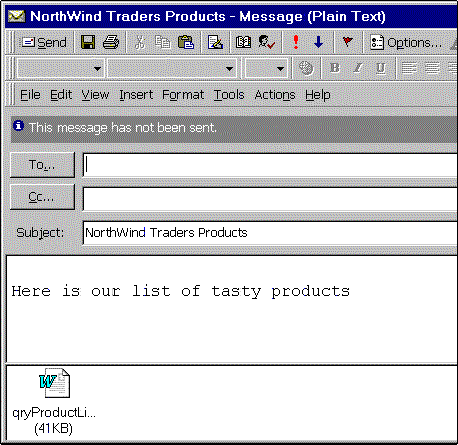
The following example uses arguments of the SendObject method of the DoCmd object to send a query as an attachment, in rich-text format (RTF), which can be viewed by any modern word processor with formatting intact. Users are given the choice to preview the Outlook window or send the e-mail directly and have the Subject and Message headers of the e-mail entered automatically.
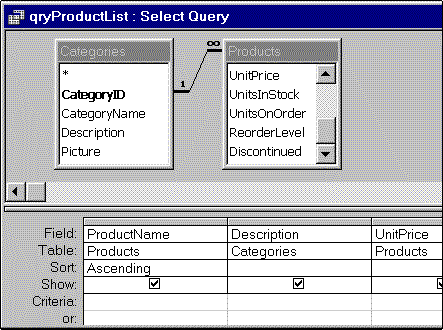
A good product list should contain at least the product name, a description of the product, and its price. Only products currently offered and in stock should be included in the list. To create the query:

Figure 1. Screen shot of qryProductList : Select Query
With the Products form still in Design view, do the following:
Private Sub cmdEmail_Click()
    ' Prevent error screen if user cancels without sending mail.
    On Error Resume Next

    Dim strToWhom     As String
    Dim strMsgBody    As String
    Dim intSeeOutlook As Integer

    ' Determine if user wants to preview message in Outlook window.

    intSeeOutlook = MsgBox("Preview e-mail message?", _
                        vbYesNo, "Northwind " & Me.Caption)

    ' If user wants to directly send item, get recipient's address.
    If intSeeOutlook = vbNo Then
        strToWhom = InputBox("Enter recipient's e-mail address.", _
                        "Northwind Product List")
            intSeeOutlook = False
     End If

    ' Send query in RTF format.
    ' Open Outlook window if intSeeOutlook is True.
    ' Provide Subject title bar and message text.
    DoCmd.SendObject acSendQuery, "qryProductList", acFormatRTF, _
              strToWhom, , , "NorthWind Traders " & Me.Caption, _
              "Here is our list of tasty products", intSeeOutlook

End Sub

Figure 2. E-mail sent by the Products form
It is advisable to disable the Send menu item while the Products form is active. This will prevent users from inadvertently sending out the whole Products table, as discussed earlier. Because a menu item is global to the application, it should be reenabled when the form is deactivated.
Sub SendOnOff()
    Dim cmdBar   As CommandBarControl
    Dim bolOnOff As Boolean

    ' Identify menu item.
    Set cmdBar = CommandBars("File").Controls("Send...")
    ' Give a variable its current state (Enabled or Disabled).
    bolOnOff = cmdBar.Enabled
    ' Toggle the Enabled property of the menu item.
    cmdBar.Enabled = Not bolOnOff
End Sub
Private Sub Form_Activate()
    Call SendOnOff
End Sub

Private Sub Form_Deactivate()
    Call SendOnOff
End Sub
For more information, see the Access "SendObject Method" Help topic for the general syntax of the SendObject method, as well as information on the object types that may be sent and the formats they may be sent in.