Using Sound Cues in Microsoft Office 97-Based Solutions
Charlie Kindschi
Microsoft Corporation
April 3, 1998
Click here to copy the Sound sample discussed in the article below.
Adding various sound cues to events in Microsoft® Office applications can make them easier and more fun to use. Moreover, assigning unique sounds that will play whenever specific command buttons are pressed or specific text boxes are active can actually help increase a user's speed and accuracy. (Note that Office doesn't include an ActiveX® control designed to play sound clips in response to control events.)
This article provides easy step-by-step instructions on how to use a Microsoft Windows® application programming interface (API) function call to add sound cues to events in Office applications. You can use the PlaySound API function to play short sounds or long sounds, and to return control to the user while the sounds are playing. The article concludes with a discussion on programming PlaySound to play sounds in a random order.
If you'd prefer to go straight to the completed sample (workbook) and hear the sound cues in action, skip to the section "Use the Sound.xls workbook" at the end of this article for directions on downloading, setting up, and using the example created by performing the procedures in the article.
There are two main steps involved in employing any Windows API function:
- You must declare the function and any constant values it uses in the General Declarations portion of a code module.
- You must call the function by using the correct parameters.
Declaring the PlaySound Function
As with any other API function, you must declare the PlaySound function before you can use it. Insert the following declaration in the General Declarations section of any user form class module:
Private Declare Function PlaySound Lib "winmm.dll" _
 Alias "PlaySoundA" (ByVal lpszName As String, _
 ByVal hModule As Long, ByVal dwFlags As Long) As Long
Note the keyword Private in this declaration. Windows API functions that are declared in a form module must be Private in scope. If you declare the function in a standard module, you can declare the function as Public.
The Long type variable returned by the PlaySound function will be either 1 or 0; 1 indicates success in playing the designated sound, and 0 indicates failure to play the sound. You may find this useful in error-handling code. For example, if a designated sound file is missing or has been corrupted, you might want to notify the user.
Tip If you're using the Office Developer Edition (ODE) or Visual Basic® 5.0, you can find all of the Windows API declaration and constant values in the file Win32API.txt, which is located on your hard disk, or you can download a free copy of this file from the Free Stuff bin on the Office Developer Forum Web site (www.microsoft.com/officedev/o-free.htm).
The default location of Win32API.txt for ODE developers is C:\ Program Files\Microsoft Office\ODETools. If you're using Visual Basic 5.0, consult your documentation or use Windows\Start\Find File or Folders to find Win32API.txt.
Using the PlaySound Function
Putting the PlaySound function to use is very easy. There are three arguments that must be set for PlaySound to operate:
- A string that represents the path and name of the Windows audio file to be played, in double quotation marks.
- A zero (0), unless you're using an embedded resource. Embedded resources are things such as icons, menus, and sound files that are often embedded in executable files by application developers. The reason for embedding a resource is to reduce the number of files that must be shipped and to protect intellectual property rights. An in-depth discussion of creating embedded resources is beyond the scope of this article; therefore, a zero will denote the second argument of the PlaySound function in all of the example code in the article.
- A flag constant or another zero. See the table at the end of this section for a list of flag constants.
The following line of code will play a file named "Type.wav," assuming that Type.wav is located in the same folder as the active document:
Call PlaySound("Type.wav", 0, 0)
Note If no flags have been set, PlaySound will try to determine the meaning of its first argument, lpszName. It's better coding practice to specify at least the SND_FILENAME flag. The SND_FILENAME flag tells the PlaySound function that it's dealing with a file rather than a memory address or a system sound. To use a constant with the PlaySound function, or with any other API function, you must first declare the constant in the General Declarations section of the code module that contains the API function declaration. The standard syntax for this is as follows:
Private Const FlagConstant = Value of FlagConstant
Some of the available flags for the flags argument are listed below in a table. You can combine flag values — for example SND_FILENAME and SND_ASYNC — separated by the keyword Or. The SND_ASYNC flag tells the PlaySound function to begin playing the sound and to immediately return control to the user so he or she can continue interacting with the program while the sound plays.
Private Const SND_FILENAME = &H20000     ' Name is a file name.
Private Const SND_ASYNC = &H1            ' Play asyncronously.

Call PlaySound("Type.wav", 0, SND_FILENAME Or SND_ASYNC)
The preferred syntax for calling PlaySound to generate short sound cues is as follows:
Private Const SND_FILENAME = &H20000     ' Name is a file name.

Call PlaySound("Type.wav", 0, SND_FILENAME)
Table 1. Flags you can use with PlaySound
| Flag |
Value |
Description |
| SND_SYNC |
&H0 |
(Default flag) Plays sound synchronously, all the way through. |
| SND_ASYNC |
&H1 |
Plays sound asynchronously. |
| SND_RESOURCE |
&H4004 |
Indicates that the sound is from a resource file. |
| SND_FILENAME |
&H20000 |
Indicates that the sound is a .wav file. |
| SND_ALIS_ID |
&H10000 |
Indicates that the sound is a system sound. This is the ID in the Win.ini file [Sounds]. |
| SND_MEMORY |
&H4 |
Indicates that the sound name resides in memory. |
| SND_NOWAIT |
&H2000 |
Doesn't wait if the sound driver is busy. |
| SND_LOOP |
&H8 |
Continues playing the sound until the function is called again. |
| SND_NODEFAULT |
&H2 |
Doesn't play the default sound (Beep) if the listed sound isn't valid. |
| SND_NOSTOP |
&H10 |
Doesn't stop the current sound. |
Test-Drive PlaySound
In this project, you'll add command buttons and code to a user form in Microsoft Excel and then use those command buttons to play and stop the sounds you've programmed for them. The following series of procedures will work equally well in Microsoft Word, Microsoft Excel, or Microsoft PowerPoint®. The code structures will also work in Microsoft Access, but the procedures used with forms and code modules are slightly different for Access and are not covered in this article.
Add a sound cue command button to a user form
- In Excel, open a new workbook.
- Press ALT+F11 to open the Visual Basic Editor, then insert a new user form by clicking UserForm on the Insert menu.
- Insert a command button on the user form by dragging the CommandButton control from the Toolbox onto the form.
- If the Toolbox isn't displayed when you open the Visual Basic Editor, click Toolbox on the View menu.
- In the Properties window, set the command button's Name property to cmdPlayType, and set its Caption property to Play Type Sound.
- Declare the PlaySound function and the SND_FILENAME flag constant by inserting the following code into the General Declarations section of the user form class module.
Private Declare Function PlaySound Lib "winmm.dll" _
 Alias "PlaySoundA" (ByVal lpszName As String, _
 ByVal hModule As Long, ByVal dwFlags As Long) As Long

Private Const SND_FILENAME = &H20000     '  Name is a file name.
- When you installed Office, you got sound files with it. One of these files is Type.wav. By default, this file is located in C:\Windows\Media\Office97.
- In the Code window, enter the following code in the command button's Click event procedure:
Call PlaySound("C:\Windows\Media\Office97\Type.wav", 0, _
    SND_FILENAME)
- Be aware that the folder referenced in this code as C:\Windows is named C:\Win95 on some systems. If your copy of Type.wav is located somewhere other than in C:\Windows\Media\Office97, adjust the path in the code to reflect this difference.
Adjust the size of your user form, and then align the Play Type Sound button so that your project resembles the illustration following this procedure.
- Name the workbook "Sound.xls" and save it in your C:\MyDocuments folder.
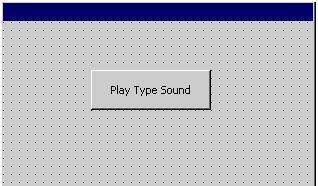
Figure 1. User form with the Play Type Sound button added
Play the sound cue you just programmed
With the code you added in the preceding exercise, you can begin playing short sounds—assuming, of course, that your computer has a working sound system. The operative word in the last sentence is short. The default behavior of the PlaySound function is to take control of the processor and not release it until the sound has stopped playing. This is because the default dwFlags argument of the PlaySound function is SND_SYNC, which tells the function to play a sound all the way through before returning control to the user.
The use of the SND_ASYNC flag to eliminate this problem will be discussed later in this article.
- In the Visual Basic Editor, run the procedure created in the preceding exercise by clicking the Run Sub/UserForm button.
- Click the Play Type Sound button.
You should hear a clacking sound similar to the sound that an old-style typewriter makes when a key is pressed.
- Close the form by clicking the close button (X) in the upper-right corner.
- In the Visual Basic Editor, double-click the user form to open its code module.
Note If you want more sound files, you need look no further than your Office compact disc. Most of the sounds available for Office are not installed during a Typical setup. To get the rest of the Office sounds, you need the Sounds.exe file, which you'll find in the \Valuepack\Sounds folder on the Office compact disc. Or, if you prefer, you can download this file from the following location on the Web: http://officeupdate.microsoft.com/downloaddetails/sounds.htm. (Registration may be required.) After you've obtained the Sounds.exe file, just double-click it and then follow the setup instructions.
Play longer Windows audio files
In this section, you'll use the SND_ASYNC flag to augment the simple sound application you've been building so that it will play longer sounds. The SND_ASYNC flag tells the PlaySound function to return control to the user as soon as a sound begins to play.
- Download the sound file Pants.wav file from the Web site http://officeupdate.microsoft.com/downloaddetails/sounds.htm, and copy it to C:\Windows\Media\Office97 on your machine.
- Add two more command buttons to the user form, using the directions given in step 3 of the procedure "Add a sound cue command button to a user form" earlier in this article.
- Set the Name properties of these command buttons to cmdPlayPants and cmdStopPlay, and set their Caption properties to Play Pants Sound and Stop Play, respectively.
- In the Code window, add the following code to the Click events of your new command buttons:
Private Sub cmdPlayPants_Click()
Call PlaySound("C:\Windows\Media\Office97\Pants.wav", 0, _
SND_FILENAME)
End Sub

Private Sub cmdStopPlay_Click()
Call PlaySound("", 0, 0)
End Sub
- Adjust the size of the user form and align the three command buttons so that your project resembles the illustration following this procedure.
- Click Run Sub/UserForm.
- On your "live" form, click the Play Pants Sound button, and then click the Stop Play button.
You no doubt noticed that clicking the Stop Play button didn't stop the sound.
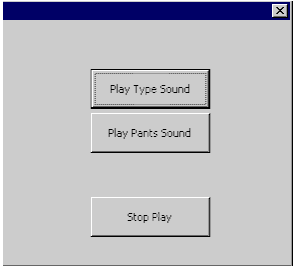
Figure 2. User form in run view
Playing a longer sound such as Pants.wav makes it easy to see just how pivotal the SND_ASYNC flag can be. Clicking the Stop Play button had no effect because the default action of the PlaySound function is to play synchronously. To remedy this behavior, perform the steps in the following procedure.
Use the SND_ASYNC flag to make the sound asynchronous
- Declare the SND_ASYNC constant by adding the following line of code just below the line you used to declare the SND_FILENAME constant (see step 5 in the first procedure in the article):
Private Const SND_ASYNC = &H1 ' Play asynchronously.
Note Some developers feel that it's good coding practice to declare all the available constants when declaring an API function.
Make the following change to the code in the Click event for the cmdPlayPants button:
Private Sub cmdPlayPants_Click()
    Call PlaySound("C:\Windows\Media\Office97\Pants.wav", 0, _
    SND_FILENAME Or SND_ASYNC)
End Sub
- Click Run Sub/UserForm.
- Click the Play Pants Sound button and then the Stop Play button, as you did earlier.
This time, as you'll notice, clicking Stop Play really does stop the sound.
The code in the Click event for the Stop Play button works by passing an empty string as the first argument of the PlaySound function. The Click event of the cmdStopPlay button can now work to stop playing the sound because control was passed back to the user (meaning the CPU) the moment Pants.wav began to play, thanks to the SND_ASYNC flag.
Loop the loop
It's sometimes necessary to simulate a long sound file by playing a short one in a continuous loop. In this procedure, you'll program a command button to simulate the sound of an automobile race.
- Search your C:\Windows\Media\Office97 folder for a file named "Driveby.wav." This is a standard Office sound file, so you probably have it.
- Declare the SND_LOOP constant; refer to the instructions given in step 6 of the procedure "Add a sound cue command button to a user form" earlier in this article, if necessary. The declaration is as follows:
Const SND_LOOP = &H8 ' Loop the sound until next call.
- Add another command button to the user form.
- Set the new button's Name property to cmdLoopSound, and set its Caption property to Play Loop Sound.
- Adjust the size of the user form, then align the four command buttons so that your project resembles the illustration following this procedure.
- Add code to the Click event for the cmdLoopSound button, using both the SND_ASYNC and SND_LOOP flags, so that it looks like the following:
Private Sub cmdLoopSound_Click()
    Call PlaySound("C:\Windows\Media\Office97\Driveby.wav", 0, _
    SND_LOOP Or SND_ASYNC)
End Sub
- Click Run Sub/UserForm.
- Click the Play Loop Sound button. When you're finished listening, click the Stop Play button.
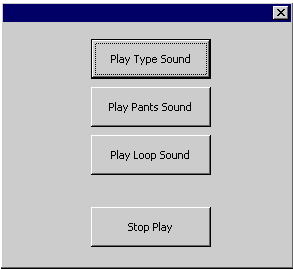
Figure 3. User form with Play Loop Sound button added
Add a random act of kindness
As the final phase of this project, you can insulate users from boredom by programming your application to play a variety of different sounds in response to user actions. The code in this procedure will cause the application to randomly play one of three sounds if the Play Random Sound button has been clicked.
- Add another command button to the user form. Set the new button's Name property to cmdRandomSound, and set its Caption property to Play Random Sound.
- Add the following code to the Click event for the cmdRandomSound button:
Private Sub cmdRandomSound_Click()

' This formula is Int(highest number - lowest number + 1 *
' the random function + 1.
' It will generate a random integer between the upper and    ' lower limits set.
' If you add more sounds change the upper limit accordingly.

Dim i As Integer

     Randomize

i = Int((3 - 1 + 1) * Rnd + 1)

' Random integer is sent to the PlayThis Function.

     Call PlayThis(i)

End Sub
- Insert a new subroutine by clicking Procedure on the Insert menu.
- In the Name box, type PlayThis. Under Scope, click the Private option button, then close the Add Procedure dialog box.
- Add the following code to the Click event for the cmdPlayThis button:
Private Sub PlayThis(Sound As Integer)
    Dim strSound As String
    Dim strFilePath As String
    strFilePath = "C:\Windows\Media\Office97\"
' Use random integer sent by cmdRandomPlay click event
' to set a value for the variable strSound.
    Select Case Sound
        Case Is = 1
                strSound = strFilePath & "pants.wav"
        Case Is = 2
                strSound = strFilePath & "type.wav"
        Case Is = 3
                strSound = strFilePath & "driveby.wav"

    End Select
' Use the value for the variable strSound as the
' first argument to the PlaySound API function.

    Call PlaySound(strSound, 0, SND_FILENAME Or SND_ASYNC)

End Sub
- Click Run Sub/UserForm. Click the Play Random Sound button several times to hear all three sound files; when you're ready, click the Stop Play button.
The Randomize statement in the Click event for the cmdRandomSound button "seeds" the RND function with a number from the system timer. The RND function is a built-in Visual Basic function that returns a random number (either 0 or 1) of the variable type Single. The line of code following this paragraph converts this into a random integer from 1 to 3 and places this number in the variable named "i". The range 1 to 3 was used because there are three sound files. If you want to randomize the playing of more than three sound files, adjust this number upward accordingly.
i = Int((3 - 1 + 1) * Rnd + 1)
A random integer from 1 to 3, inclusive, is passed to the function named "PlayThis," where it's used in a Select Case decision block to choose which sound to play. The sound file that's chosen is held in a string variable named "strSound" and is passed to the PlaySound API function.
Use the Sound.xls workbook
The project you've just completed is also provided as an Excel workbook that you can download from this Web site. This procedure shows you how to download, open, and use this workbook.
- Download the Sound.xls file, and then copy it to any folder.
- If your Microsoft Windows folder structure is anything other than C:\Windows\Media\Office97 (for example, C:\Win95\ …), see step 8 in the procedure "Add a sound cue command button to a user form" earlier in this article.
- In Excel, click Open on the File menu, and then locate Sound.xls in the folder you chose to save it to.
- Make sure that your computer has a sound card, the speakers are plugged in, and the volume is turned up. Lastly, click the command buttons to hear the sound files play.