| Object | Property | Setting |
| Timer control | (Name) Enabled Interval |
tmrCoffee True 10000 |
Thereís no need to put code in the tmrControl_Timer event procedure. As youíll see, CoffeeMonitor will handle the controlís Timer event, test the serial port, and raise the CoffeeReady event to notify CoffeeWatch.

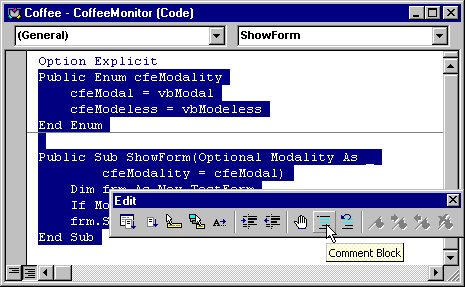
In order to view all the code at once, make sure youíve selected Full Module View, as shown by the buttons in the lower left-hand corner of the code window.
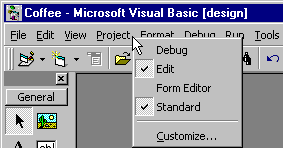
You can show the Edit toolbar using the context menu accessed by right-clicking the menu or standard toolbar, as shown here:

Option Explicit
Private mTestForm As TestForm
Private WithEvents mwtmrCoffee As Timer
Event CoffeeReady()
- CoffeeMonitor will raise the CoffeeReady event to notify the CoffeeWatch program when the coffeeís ready.
- The variable
mTestFormwill hold a reference to an instance of TestForm, whose only purpose is to hold the Timer control. - The variable
mwtmrCoffeewill hold a reference to the Timer control on the TestForm. The variable is declared WithEvents so that the CoffeeMonitor object can handle the timerís events.
Private Sub Class_Initialize()
   Set mTestForm = New TestForm
   Load mTestForm
   Set mwtmrCoffee = mTestForm.tmrCoffee
End Sub
After the instance of TestForm is created and loaded, a reference to tmrCoffee is placed in the variable mwtmrCoffee. When the reference is placed in the WithEvents variable, Visual Basic connects the timerís events to the associated event procedures in CoffeeMonitor.
Private Sub Class_Terminate()
   Set mwtmrCoffee = Nothing
   Unload mTestForm
   Set mTestForm = Nothing
End Sub
As we saw in "How Modal and Modeless Forms Behave Out of Process," objects that use forms in out-of-process components need to dispose of the forms when theyíre done with them. The first step is to set the WithEvents variable to Nothing, so that CoffeeMonitor will stop handling the Timer controlís events. Then TestForm can be unloaded, and the variable containing the reference to it can be set to Nothing.
Note Strictly speaking, thereís no need to set mTestForm to Nothing here. Visual Basic will set the variable to Nothing when it destroys the CoffeeMonitor object.
Private Sub mwtmrCoffee_Timer()
   ' (Code to test serial port omitted.)
   RaiseEvent CoffeeReady
End Sub
Event procedures associated with a WithEvents variable always begin with the variable name, as discussed in "Adding Events to Classes" in "General Principles of Component Design."
When the CoffeeMonitor object receives the Timer event, it raises its own CoffeeReady event to notify any clients (CoffeeWatch, in this case) that the coffeeís ready.
(This code simply raises the CoffeeReady event every ten seconds. If you actually have a coffee pot with a serial port, you can add code to test coffee makerís status, and conditionally raise the event.)
Note One of the advantages of using events to provide notifications is that only one reference is needed. That is, TestForm doesnít need a reference to the CoffeeMonitor object in order for the Timer control to send CoffeeMonitor an event. This avoids the circular reference problem described in "Dealing with Circular References" in "General Principles of Component Design."
Component projects should be run with CTRL+F5 (or Start with Full Compile on the Run menu) if Compile On Demand is checked, as discussed in "Showing Forms from the CoffeeMonitor Class."