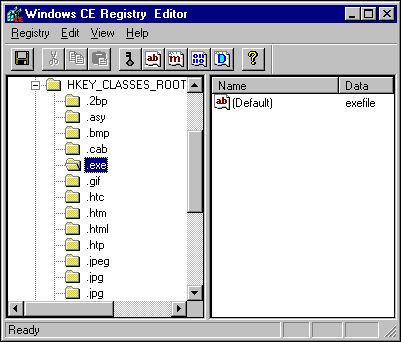
The Windows CE Remote Registry Editor is a tool for editing Windows CE system registries and adding, deleting, and modifying registry keys on Windows CE-based devices. The Windows CE system registry resides in the object store on the remote device.
The Windows CE Registry Editor window displays the My Computer and My Emulation top-level registry headings, as well as a registry heading for each device that the Registry Editor is connected to. For example, if the Registry Editor is connected to an H/PC, the Registry Editor will contain a My HPC top-level registry heading.
Double-click the appropriate registry heading to view system registry information—including information about top-level registry keys—for the desktop computer, emulation environment, or a device.
The following screen shot shows the Registry Editor window.

The following table shows the top-level registry keys.
| Registry Key | Description |
|---|---|
| HKEY_LOCAL_MACHINE | Root key for configuration information |
| HKEY_CLASSES_ROOT | Root key for associating a file with an application |
| HKEY_CURRENT_USER | Root key for configuration information about the user currently logged on to the system |
The Registry Editor not only enables you to view registry keys, but also to download and edit them.
 To download a registry key from a device
After the remote registry key downloads to your desktop computer, you can edit the key. When you edit the downloaded registry key, the user interface uses the Remote API (RAPI) to directly edit the registry of the remote device. You can export your Windows CE registry as a text file for easy viewing, as shown in the following procedure.
 To export the registry to a text file
You can use the Registry Editor to add, change, rename, and delete keys and values from the registry. The following procedures explain how to add a key or value, how to delete or rename a key or value, and how to modify a registry value.
 To add a key or value to the registry
– Or –
Select the Key icon or an icon that corresponds to one of the value types. Hold an icon in the down position for a brief moment to see its corresponding value.
 To delete or rename a registry key or value
  To change a registry value