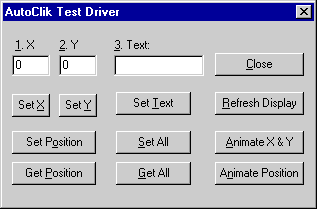
This starts Autodriv, which launches and displays the AutoClik Test Driver dialog box shown below.
AutoClik Test Driver Dialog Box

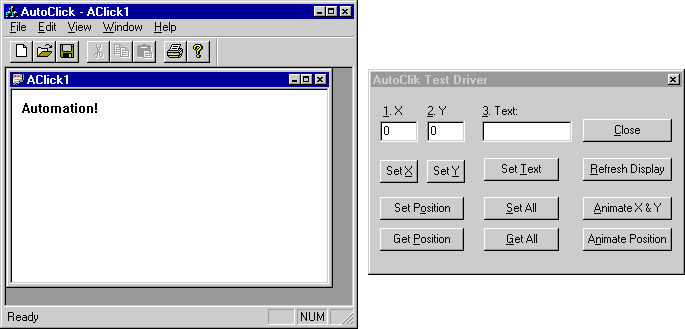
Autodriv launches AutoClik on startup.
AutoClik Window Next to Autodriv Window

Before you work through the steps of implementing AutoClik, try out the completed application. This will help you appreciate Automation functionality in general, and AutoClik’s Automation server functionality in particular, from a user’s point of view.
The first step is to register AutoClik. Just as with ActiveX object servers, an Automation server must be registered before it can be driven by any Automation client.
To install and register the AutoClik Automation server
Running AutoClik briefly as a stand-alone application registers it in the system registry as an ActiveX component.
To preview AutoClik
This starts Autodriv, which launches and displays the AutoClik Test Driver dialog box shown below.
AutoClik Test Driver Dialog Box

Autodriv launches AutoClik on startup.
AutoClik Window Next to Autodriv Window

To explore the Automation server features of AutoClik
The current AutoClik coordinates and text are now displayed in Autodriv’s window.
Notice that the x, y, and Text fields in Autodriv do not change. That is because the Automation is one direction between Autodriv and AutoClik. Although you can implement an Automation server to notify the Automation client about changes, such as the new coordinates in AutoClik, this feature requires that additional callback/notification interfaces be established so that the Automation client can implement them.
It now shows new x, y, and Text values.
AutoClik displays the changes.
| Command | Description |
| Set x, Set y | Accesses just the x or y coordinate of the text. The x and y properties of AutoClik’s document dispatch interface are exposed by using Get and Set methods. AutoClik’s implementation of SetX and SetY includes updating the window to reflect the change. |
| Get Position, Set Position | Changes the x and y coordinates of the text by using AutoClik’s second dispatch interface, which represents a Point. |
| Set Text | Changes the Text property of AutoClik, which is directly exposed as a string rather than by using a pair of Get and Set functions. This means that when you choose the Set Text command, AutoClik has no opportunity to detect the change as it did when you chose the Set x, Set y, or Set Position commands. Therefore, AutoClik does not immediately update its window. To do so, you must then click the Refresh Display button. |
| Set All | Simultaneously changes AutoClik’s x, y, and Text properties through its SetAllProps method, which uses these three parameters. AutoClik’s implementation of SetAllProps includes immediate updating of the window. |
| Get All | Queries the x, y, and Text properties of AutoClik and returns their current values. |
| Refresh Display | Updates AutoClik’s window based on the most recent values of x, y, and Text, which might have been previously set using Automation. |
| Animate x & y | Updates AutoClik’s x and y coordinates in 20 steps, by individually updating the x property and then the y property. |
| Animate Position | Updates AutoClik’s x and y coordinates through its Point interface. Because the Point interface updates both the x and y values at the same time, the animation results in a smooth diagonal movement of the text across AutoClik’s window. |