Visual InterDev
One of the key differences between an amateur and a professional Web site is consistency. Professional sites employ well-designed pages that are consistent across the site in their look and functionality.
When your site is consistent, you have a site that:
Looks professional A professional site is well designed and consistent in its use of the design. Users are more comfortable with a site that's easy to navigate and easy to read.
Saves development time When you take steps to include consistency in your development cycle, the number of tasks is reduced and simplified.
Saves authoring time Using templates, layouts, and themes can save time when authoring new files, letting the author focus on writing the actual content.
To give your Web site a crisp, professional look and feel, you can take advantage of the many tools available with Microsoft® Visual InterDev™. The larger your team is, the more effective these tools become.
When you design consistency into your site, you typically perform some or all of the following tasks.
Each of these tasks work together to provide a consistent look that assures users you’ve done a professional job.
For each site consistency task, Visual InterDev offers you:
Depending on the size of your site and your team, you might use solutions right out of the box or you may customize them a great deal. The Visual InterDev solutions for consistency include:
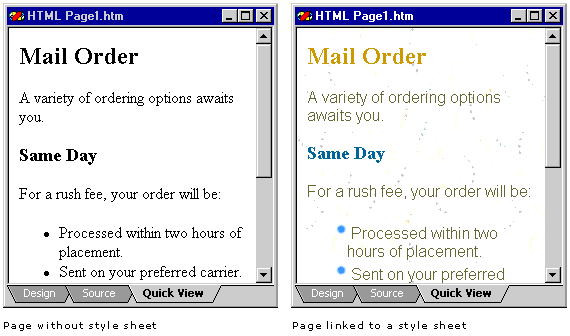
Cascading style sheets (CSS) give you the ability to define a set of styles that override the browser's standard methods for rendering HTML. This lets you give your pages a unique and consistent design. Style sheets allow you to define the attributes of any tag. For example, you can adjust the font, line spacing, justification, and border properties.
You apply a style sheet to a page by adding a <LINK> tag in the HTML document heading - between <HEAD> and </HEAD>. A <LINK> tag referencing a CSS file would look like this:
<LINK REL="stylesheet" TYPE="text/css" HREF="YourStyles/COLOR0.CSS">
Therefore, you can have as many pages as you want referencing the same style sheet. Because all the style information is stored in a single file, it is easier to maintain and saves space on the Web server.

Visual InterDev includes a CSS editor that has an easy-to-use interface for setting style properties. You can use the editor's graphical interface so that you don't have to edit raw CSS text. For information on using the CSS editor, see Editing Style Sheets and the CSS Editor Window.
Not all browsers support the use of cascading style sheets. However, when cascading styles are used correctly, browsers that don't support them will ignore them and still render the page readable. You should keep this in mind when designing with styles to make sure that the appearance of your page degrades gracefully on older platforms. CSS 1 is supported by Microsoft® Internet Explorer 4.0 and Netscape Navigator 4.0. Internet Explorer 3.0 supports a subset of CSS 1.
The use of style sheets is endless - varying from the simple to the extremely complex. For a more detailed description of CSS, see CSS Attributes reference and also see the World Wide Web Consortium's CSS specification on the Internet at http://www.w3.org/pub/WWW/TR/REC-CSS1.
Visual InterDev comes with a variety of style sheets:
You can use any of these style sheets as a model for creating your own style sheet, or you can simply make a copy and customize it to suit your needs.
When you are editing a style sheet in the CSS editor, you can use the Preview tab to see how it would look if it were applied to any page, local or on the World Wide Web.
Note If the page you are previewing already has a style sheet attached, Visual InterDev recognizes that style sheet as the primary style sheet and correctly applies the one that you are editing in a secondary position.
Templates can be an invaluable resource. Even though a template is just a master file from which new copies are made, you can use templates for HTML documents, ASP pages, CSS files, or any other text-based file. Because it takes time to create a well-designed page, the time you invest in templates pays off many times over.
By default, all templates appear in the Add Item dialog box. To add a template to the available list, add it to the following directory:
C:\Program Files\Microsoft Visual Studio\VintDev98\Templates\Web Project Items
Note After adding a template to the "Web Project Items" directory, you must restart Visual InterDev in order to display the template in the Add Item dialog box.
Take a look at the directory to see the actual templates that ship with Visual InterDev.
You can use parameters in your templates to prompt a template user for additional information, like a theme name or a company name. This allows your templates to be more flexible. For more information, see Creating Custom Templates.
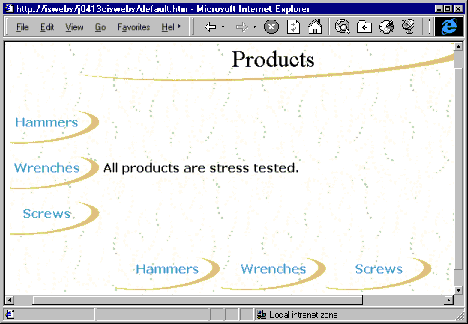
Layouts define how the content of a page is visually laid out and how users can navigate among parent, children, and sibling pages by using a PageNavbar design-time control.
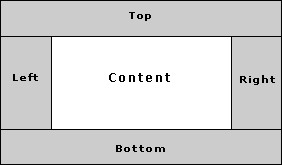
Layouts control how the regions of a page are laid out. Layouts are comprised from different possible regions of page. For example, most layouts utilize two or three of the following five possible regions:

Visual InterDev creates the regions by using HTML tables. The result looks something like the picture below. In the following picture, the Top, Left, Bottom, and Content regions were utilized.

The HTML table information is stored in a Layout Header section and Layout Footer section of the Web page. The header and footer Layout design-time controls bracket the content of your page.
Each layout is based on a unique HTML template. The template stores the layout information. When the layout is applied to a page, Visual InterDev adds the layout design-time controls to the page.
Important Do not manually alter the run-time text of the Layout design-time controls. If this text is altered, Visual InterDev might not be able to parse the information correctly. Also, when you apply a different layout, Visual InterDev deletes the current Layout design-time controls and replaces them with new ones.
Because the layout information is maintained within a template, it is easy to change which layout is applied to the page without affecting content. For step-by-step instructions on applying or customizing a layout, see Laying Out Pages.
The list of layouts that are installed on your machine was determined when you chose the Typical or Custom option while setting up Visual InterDev on your computer.
Typical Install Option The typical install option copies all 18 layouts to your machine.
Custom Install Option The Custom install option lets you choose either of the following:
Layouts reside in the "Layouts" directory, which is found at:
C:\Program Files\Microsoft Visual Studio\VintDev98\Layouts
The files that make up a layout are added to the master server automatically when you apply a layout so that the layout can be shared with other developers who might be working on the same project and need access to the files as well. Layouts are stored on the master server in a directory named "Layouts" in the project's top-level directory. These files are needed at design time, but not at run time.
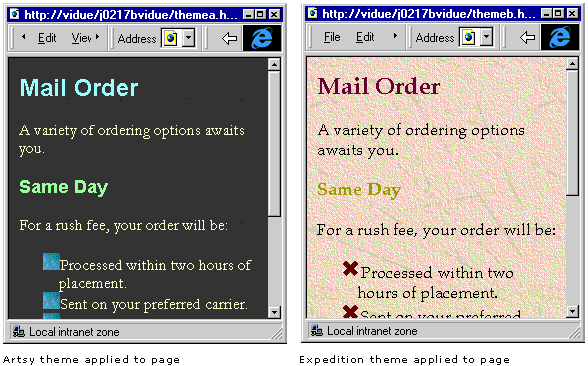
Themes are comprised of a set of graphics and one or more cascading style sheets that control styles, font, and graphics. You apply themes to pages so that there is visual consistency shared across your pages.
You can set a default theme for an entire project so that each page you create in that project will have the same theme applied. Even if a default theme for a project, you can choose to override the default on particular files where you might want to apply a different theme or no theme at all.
When you set a default theme for your project, you automatically benefit from the theme's pre-packaged design. Another advantage of themes is the ability to easily switch between different themes, without changing content, to give your site a whole different look.

You can use one of the many themes that come with Visual InterDev, modify one of the existing themes, or create your own custom theme. For step-by-step information about applying and creating themes, see Applying Themes.
When you apply a theme to a page, Visual InterDev inserts <LINK> tags within the <HEAD> block. For example, the following text is inserted when the Artsy theme is applied:
<LINK REL="stylesheet" TYPE="text/css" HREF="Themes/artsy/COLOR0.CSS" VI98THEME="artsy">
<LINK REL="stylesheet" TYPE="text/css" HREF="Themes/artsy/GRAPH0.CSS" VI98THEME="artsy">
<LINK REL="stylesheet" TYPE="text/css" HREF="Themes/artsy/THEME.CSS" VI98THEME="artsy">
<LINK REL="stylesheet" TYPE="text/css" HREF="Themes/artsy/CUSTOM.CSS" VI98THEME="artsy">
In the example above, three <LINK> tags have been inserted because the Artsy theme uses three cascading style sheets.
The list of themes that are installed on your machine was determined when you chose Typical or Custom while setting up Visual InterDev on your computer.
Typical Install Option The Typical install option copies 17 themes to your machine. These 17 themes include:
Custom Install Option The Custom install option lets you choose one of the following
Each set of files that makes up a theme is maintained in a single directory. The directory name is identical to the theme name.
The theme directories are stored locally in the "Themes" directory, which is typically found at:
C:\Program Files\Common Files\Microsoft Shared\Themes
Note In Visual InterDev 1.0, the theme files were spread across different directories. In this version of Visual InterDev, all the files that make up a theme reside in the same directory.
Themes are stored on the master server in a directory named "Themes" in the project's top-level directory. The files that make up a theme are added to the master server automatically when you apply a theme.
When you deploy your Web application, include the Themes directory and sub-directories when you copy the files to the production server.
You can access a master application on the server from either a Visual InterDev Web project or a FrontPage project. This allows team members to use their preferred tool of choice. For example, a team might have developers who use Visual InterDev's enhanced scripting capabilities to access the master application and designer and writers prefer to use the design features of FrontPage to access the same master application.
For information about the differences between Visual InterDev and FrontPage, see Using FrontPage and Visual InterDev to Create Web Sites.
Each theme comes with an assortment of additional graphics to complement the basic ones that are used by default. You can use these additional graphics to enhance the design of your pages. Look inside a theme's directory to see all the .GIF images that are available in a particular theme.
Tip When you drag an image from the Project Explorer onto a page, Visual InterDev automatically inserts an <IMG> tag with the correct URL.
When you use images in the Themes directory, be sure to include the correct URL in the <IMG> tag.
Note If you apply a new theme to the page, you will need to manually update the URLs of all images that you added by hand.
After you've decided how the tools discussed above interest you, you can use them to simply the process of creating and maintaining a visually appealing and consistent Web site. You can:
When a theme or a layout is applied, it is automatically copied to the master server so that it can be shared with all team members.
If you want to share a template with team members, make the master copy available to them. Each team member must then make a copy and place it in the Templates directory on the workstation.